9
Rotating Brushbar: Removal & Replacement/Lightbulb: Removal & Replacement
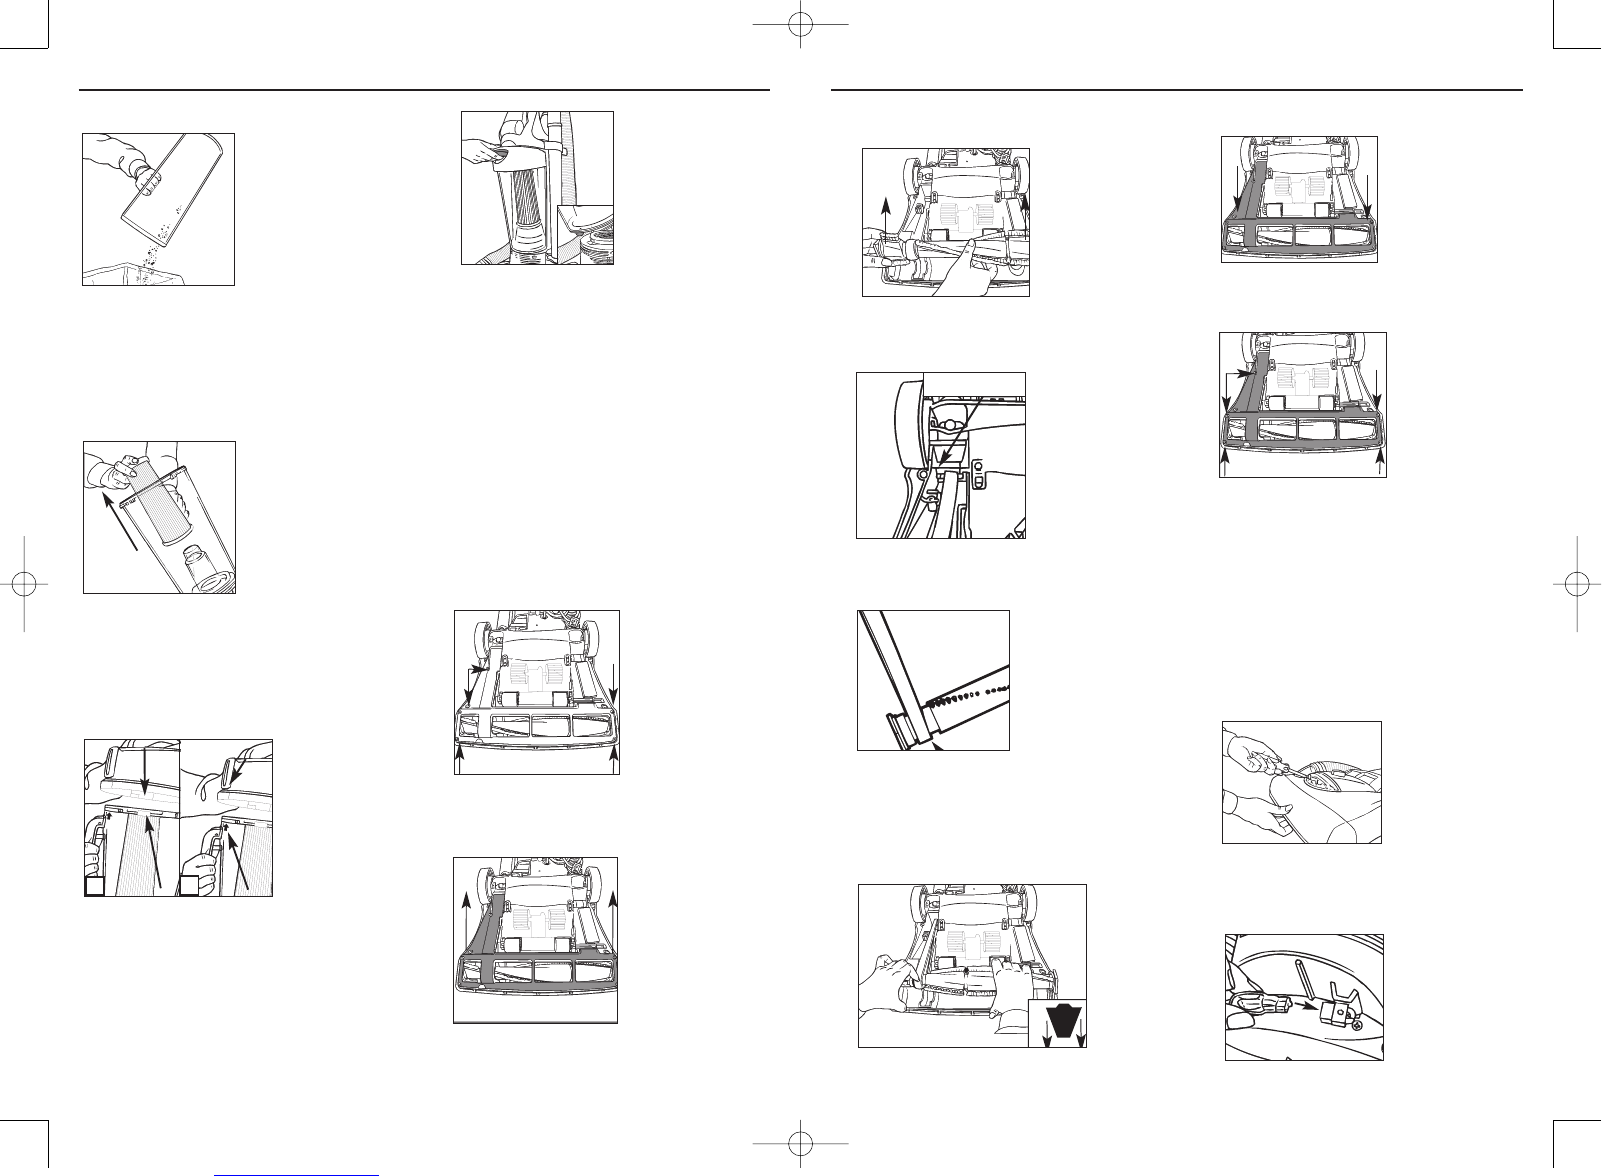
5. Empty the dirt container completely (Fig.6/4).
6. Each time the dirt container is emptied, the filter
should be cleaned. Tap the filter firmly against the
side of a rubbish bin until the dust stops falling
from the filter. Return the filter to the dirt container.
Push the filter into place to prevent dirt leakage.
(Fig.6/5).
7. Align slots on lid with tabs on dust container
(Fig.6/6A). Push the lid down and twist clockwise.
NOTE: There is a guide line on back of dust
container lid. Align line with arrow on the dirt
container and turn clockwise until secure (Fig.6/6B).
8. Return the dirt container to the vacuum cleaner.
Set the aligning tab on the bottom of the dirt
container into the rectangular slot on the cleaner
(inset). Push to click into place (Fig 6/7).
7. Rotating Brushbar:
Removal & Replacement
Tool Required: Phillips screwdriver.
WARNING: To reduce the risk of injury from moving
parts, unplug the cleaner before changing the belt
or the rotating brushbar.
To Remove the Belt
1. Lay the vacuum cleaner flat and turn it over to
expose the nozzle base. The base should lay flat
and face upwards. To remove the nozzle guard,
use a Phillips screwdriver to remove the five (5)
screws. Arrows show the location of the screws
(Fig.7/1).
2. Lift the nozzle guard (Fig.7/2).
4. Re-attach the nozzle guard (Fig.7/7).
5. Replace all five (5) screws to secure the nozzle
guard (Fig.7/8).
8. Lightbulb: Removal &
Replacement
WARNING: To reduce the risk of electric shock,
unplug the cleaner before removing or replacing
lightbulb.
Tool Required: Phillips screwdriver.
1. Lean cleaner handle back. Remove the two (2)
screws located on either side of the headlight
lens (Fig.8/1).
2. Pull the bulb out of socket to remove. Do NOT twist.
Gently push a new bulb into the socket to replace
(Fig.8/2).
8
Dirt Container & Filter: Removal & Replacement/Rotating Brushbar: Removal & Replacement
Fig.6/5
Fig.6/6A
Fig.6/7
Fig.7/1
Fig.7/2
3. Lift and remove the brushbar. Dispose of the old
belt (Fig.7/3).
To Replace the Belt or Brushbar
1. Slide the belt on to the motorshaft (Fig.7/4).
2. Place the new belt in the area of the brushbar
without bristles (Fig.7/5).
3. With the new belt in place, pull and slide the
brushbar into the nozzle, making sure that the end
caps are in the correct orientation (Fig.7/6A).
Rotate the brushbar manually to make sure belt is
properly aligned (Fig.7/6).