Use & Function
4
Use & Function
Cleaning floors
5
The recommended sequence of cleaning is as follows:
Operating
sequence
Brushbar
Switch
Nozzle
setting
Trigger
switch
Dry
Vacuum
OFF
Released
OFF
Wet
Cleaning
ON
Depressed
ON
Drying
OFF
Released
ON
IMPORTANT: TO PREVENT DAMAGE TO WOOD
FLOORS, FOLLOW THE MANUFACTURERS
CLEANING RECOMMENDATIONS. BEFORE USING
ON SEALED WOOD FLOOR, ENSURE THAT
SURFACE IS NOT WORN, BARE OR HAS
SEPARATED JOINTS. DO NOT USE IN WET
CLEANING MODE WITH THE BRUSHBAR ON.
DO NOT USE IF ANY OF THESE CONDITIONS EXIST.
DO NOT USE ON UNSEALED WOOD/LAMINATE
FLOORS.
Fill
Fig.3/3 Fig.3/4
1. Push down on Clean/Dirty Water Tank latch. Pull
tank up and out. Fig 3/3.
Fig.3/5 Fig.3/6
2. Remove cap from Clean Water Tank. Fig 3/4.
3. Pour 2 capfuls of Vax AAA Carpet Cleaner or Vax
Multi Floor Hard Floor Cleaner concentrate into
solution bottle cap. Fig 3/5 and 3/6.
IMPORTANT: DO NOT USE PINE, SOLVENT, OR
WAX BASED CONCENTRATES IN CLEANER.
4. Fill remainder of Clean Water Tank with warm
[max 40C] water up to the max fill line. Replace
cap on tank. Fig 3/7
.
Fig.3/7 Fig.3/8
5. Replace Clean/Dirty Water Tank into main body of
cleaner. Snap latch to secure. (Fig.3/8).
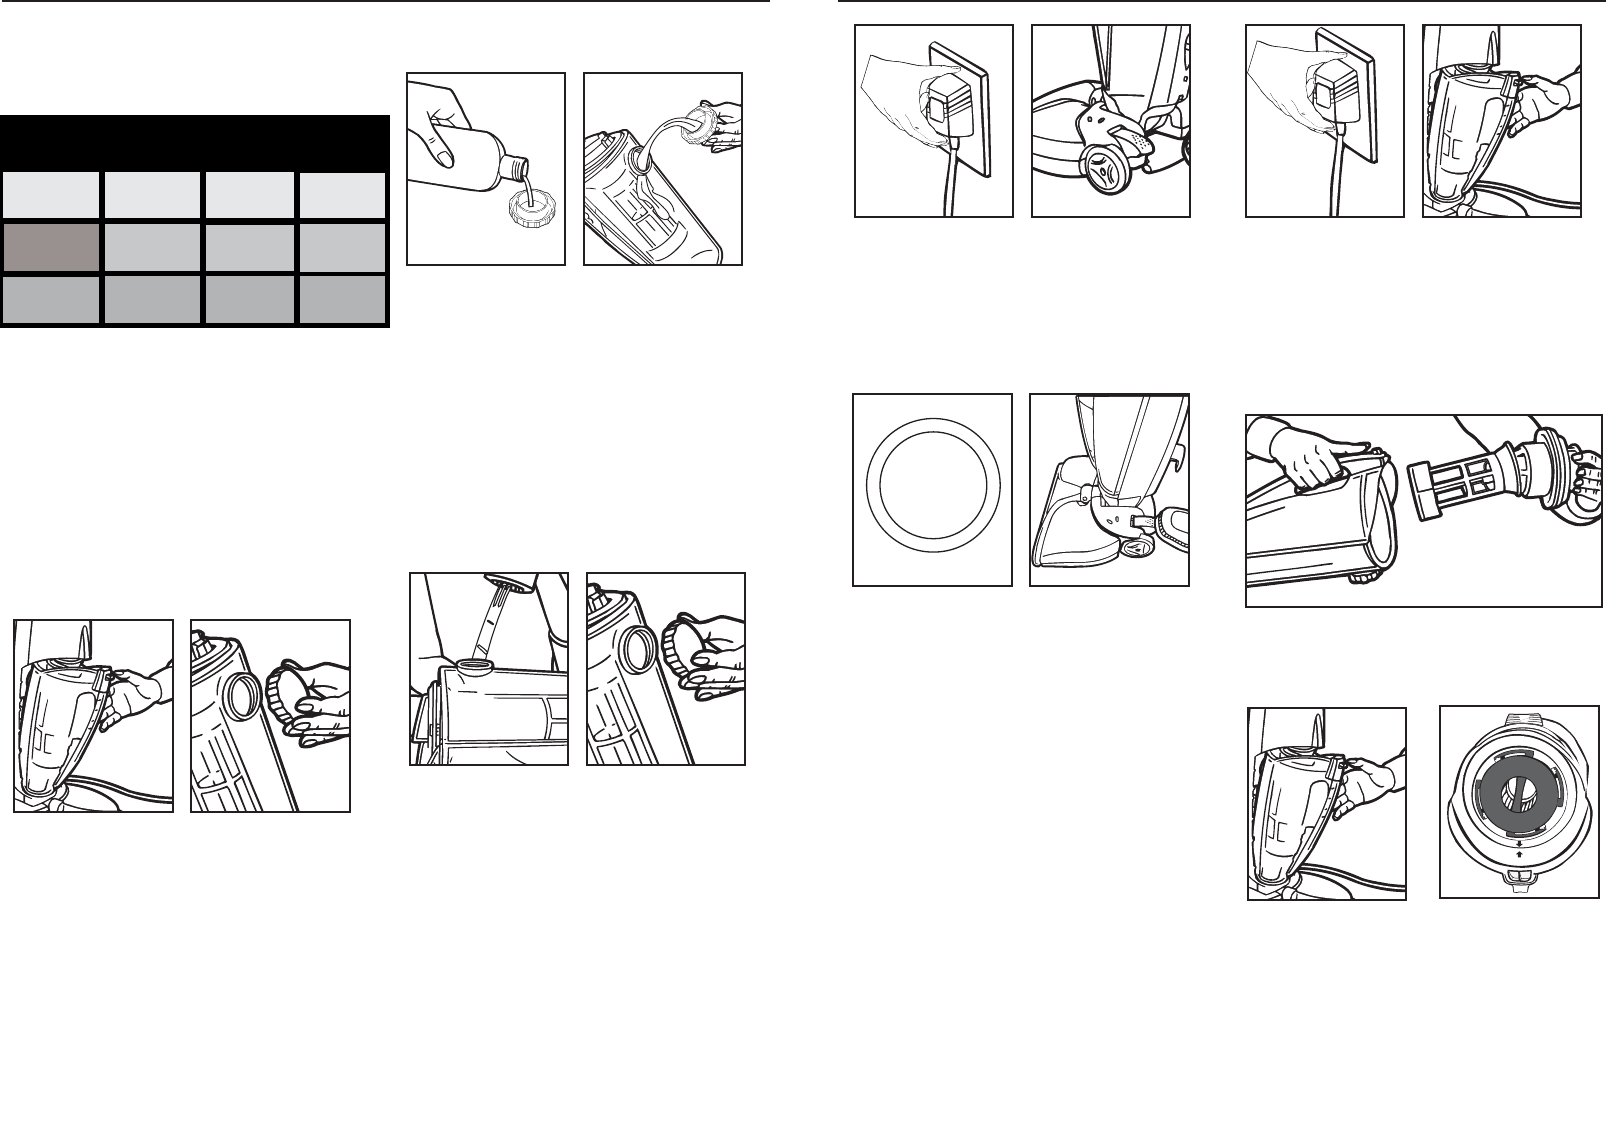
6. With dry hands, plug cord into properly grounded
electrical outlet. (Fig.3/9).
7. Step on Handle Release pedal to put into cleaning
position. (Fig.3/10).
Fig.3/9 Fig.3/10
8. Turn cleaner on by switching the power on/off
switch [located on the side of the cleaner]. Fig. 3/11.
9. Step on the Nozzle Setting pedal to switch to
select the cleaning option. Fig. 3/12.
Fig.3/9 Fig.3/10
Emptying and cleaning the dirty water
tank
IMPORTANT: TO REDUCE THE RISK OF INJURY
FROM MOVING PARTS - UNPLUG BEFORE
SERVICING.
Your cleaner is equipped with a shut off valve within
your Dirty Water Tank. Empty the Dirty Water Tank
when the wet and/or dry debris reaches the “Debris
Max Fill” line on the outside of the Clean/Dirty Water
Tank or the float rises, shutting off air flow through
the nozzle.
NOTE: You will hear a noticeable change in the
pitch of the cleaner. This indicates a need to empty
the Dirty Water Tank. The outer tank (Clean Water
Tank) contains the cleaning solution and water mix
while the inner tank (Dirty Water Tank) collects dry
and wet debris.
1. Disconnect cleaner from electrical outlet. Place
cleaner handle in upright and locked position. Fig
3/9.
2. Push down on Clean/Dirty Water Tank latch while
grabbing handle and pulling tank up and out from
main body of cleaner. Fig 3/10
Fig.3/9 Fig.3/10
3. Grasp tab and pull up to remove filter assembly
out of tank. (Fig 3/11) Empty contents into sink.
4. Return the filter back into Clean/Dirty Water Tank.
To ensure a proper fit, make sure arrow on the filter
is aligned with the arrow on Clean Water Tank Cap.
Fig 3/12.
5. Replace Clean/Dirty Water Tank into main body of
cleaner and snap Clean/Dirty Water Tank latch
into place. Fig. 3/13.
Fig.3/11
Fig.3/12