PPLIMW15250Ba
BT-DRF-02
IMPORTANT
Before starting work the installe should carefully read this Installation & Operati
Manual, and mak
- The therm
People in the course of training are only allowed to handle the produc under the
supervision of an experienced fit Subject to obser of the above terms, the
manufacture sh
- All instructions in this I & Operation m should b obse when
working with Any other with regulations.
The manufacturer s not be liable in case of incompetent u of the control. An
modifications a
The maintenance ma be p b s shops approv by the manufacturer
only.
- The c f depe on the m and e Thi i
leaflet is part of the
APPLICATION
- The thermostats range “BT-DRF-02” has been developed to control and manage all
type of Electrical
- The controllers have been desi for use in residential rooms, office s and
industrial facilities.
Please find the W
http://www.watts
Table of content
1 Presentation
1.1 Keyboard
1.2 LED & Displa
2 First Installatio
2.1 Batteries installati
2.2 RF installation
2.2.1 W
2.2.2 Case of central
2.3 Starting
3 W
3.1 Manual mode Comf
3.2 Manual mode Re
3.3 OFF mode
3.4 Anti-freeze mode
3.5 Timer mode
3.6 Reversible mod
3.7 AUTO mode
4 Special function
4.1 Keyboards lock
4.2 Open window functi
4.3 Humidity measurem
4.4 Visualization
5 Parameter’s menu
6 Technical charact
7 Troubleshooting &
8 Advanced installe
1 Presentation
Electronic thermostat with LCD displa sp designed to control different type of
heating systems.
It will be your be p t op your energy consumption a increas y
comfort.
- Modern desig
- Wireless Bidirectional
- Temporar
- Anti freeze functi
- EEPROM non v
- 2 AAA batteries
- 2 parameter me
- Humidity measurem
In option
External sensor
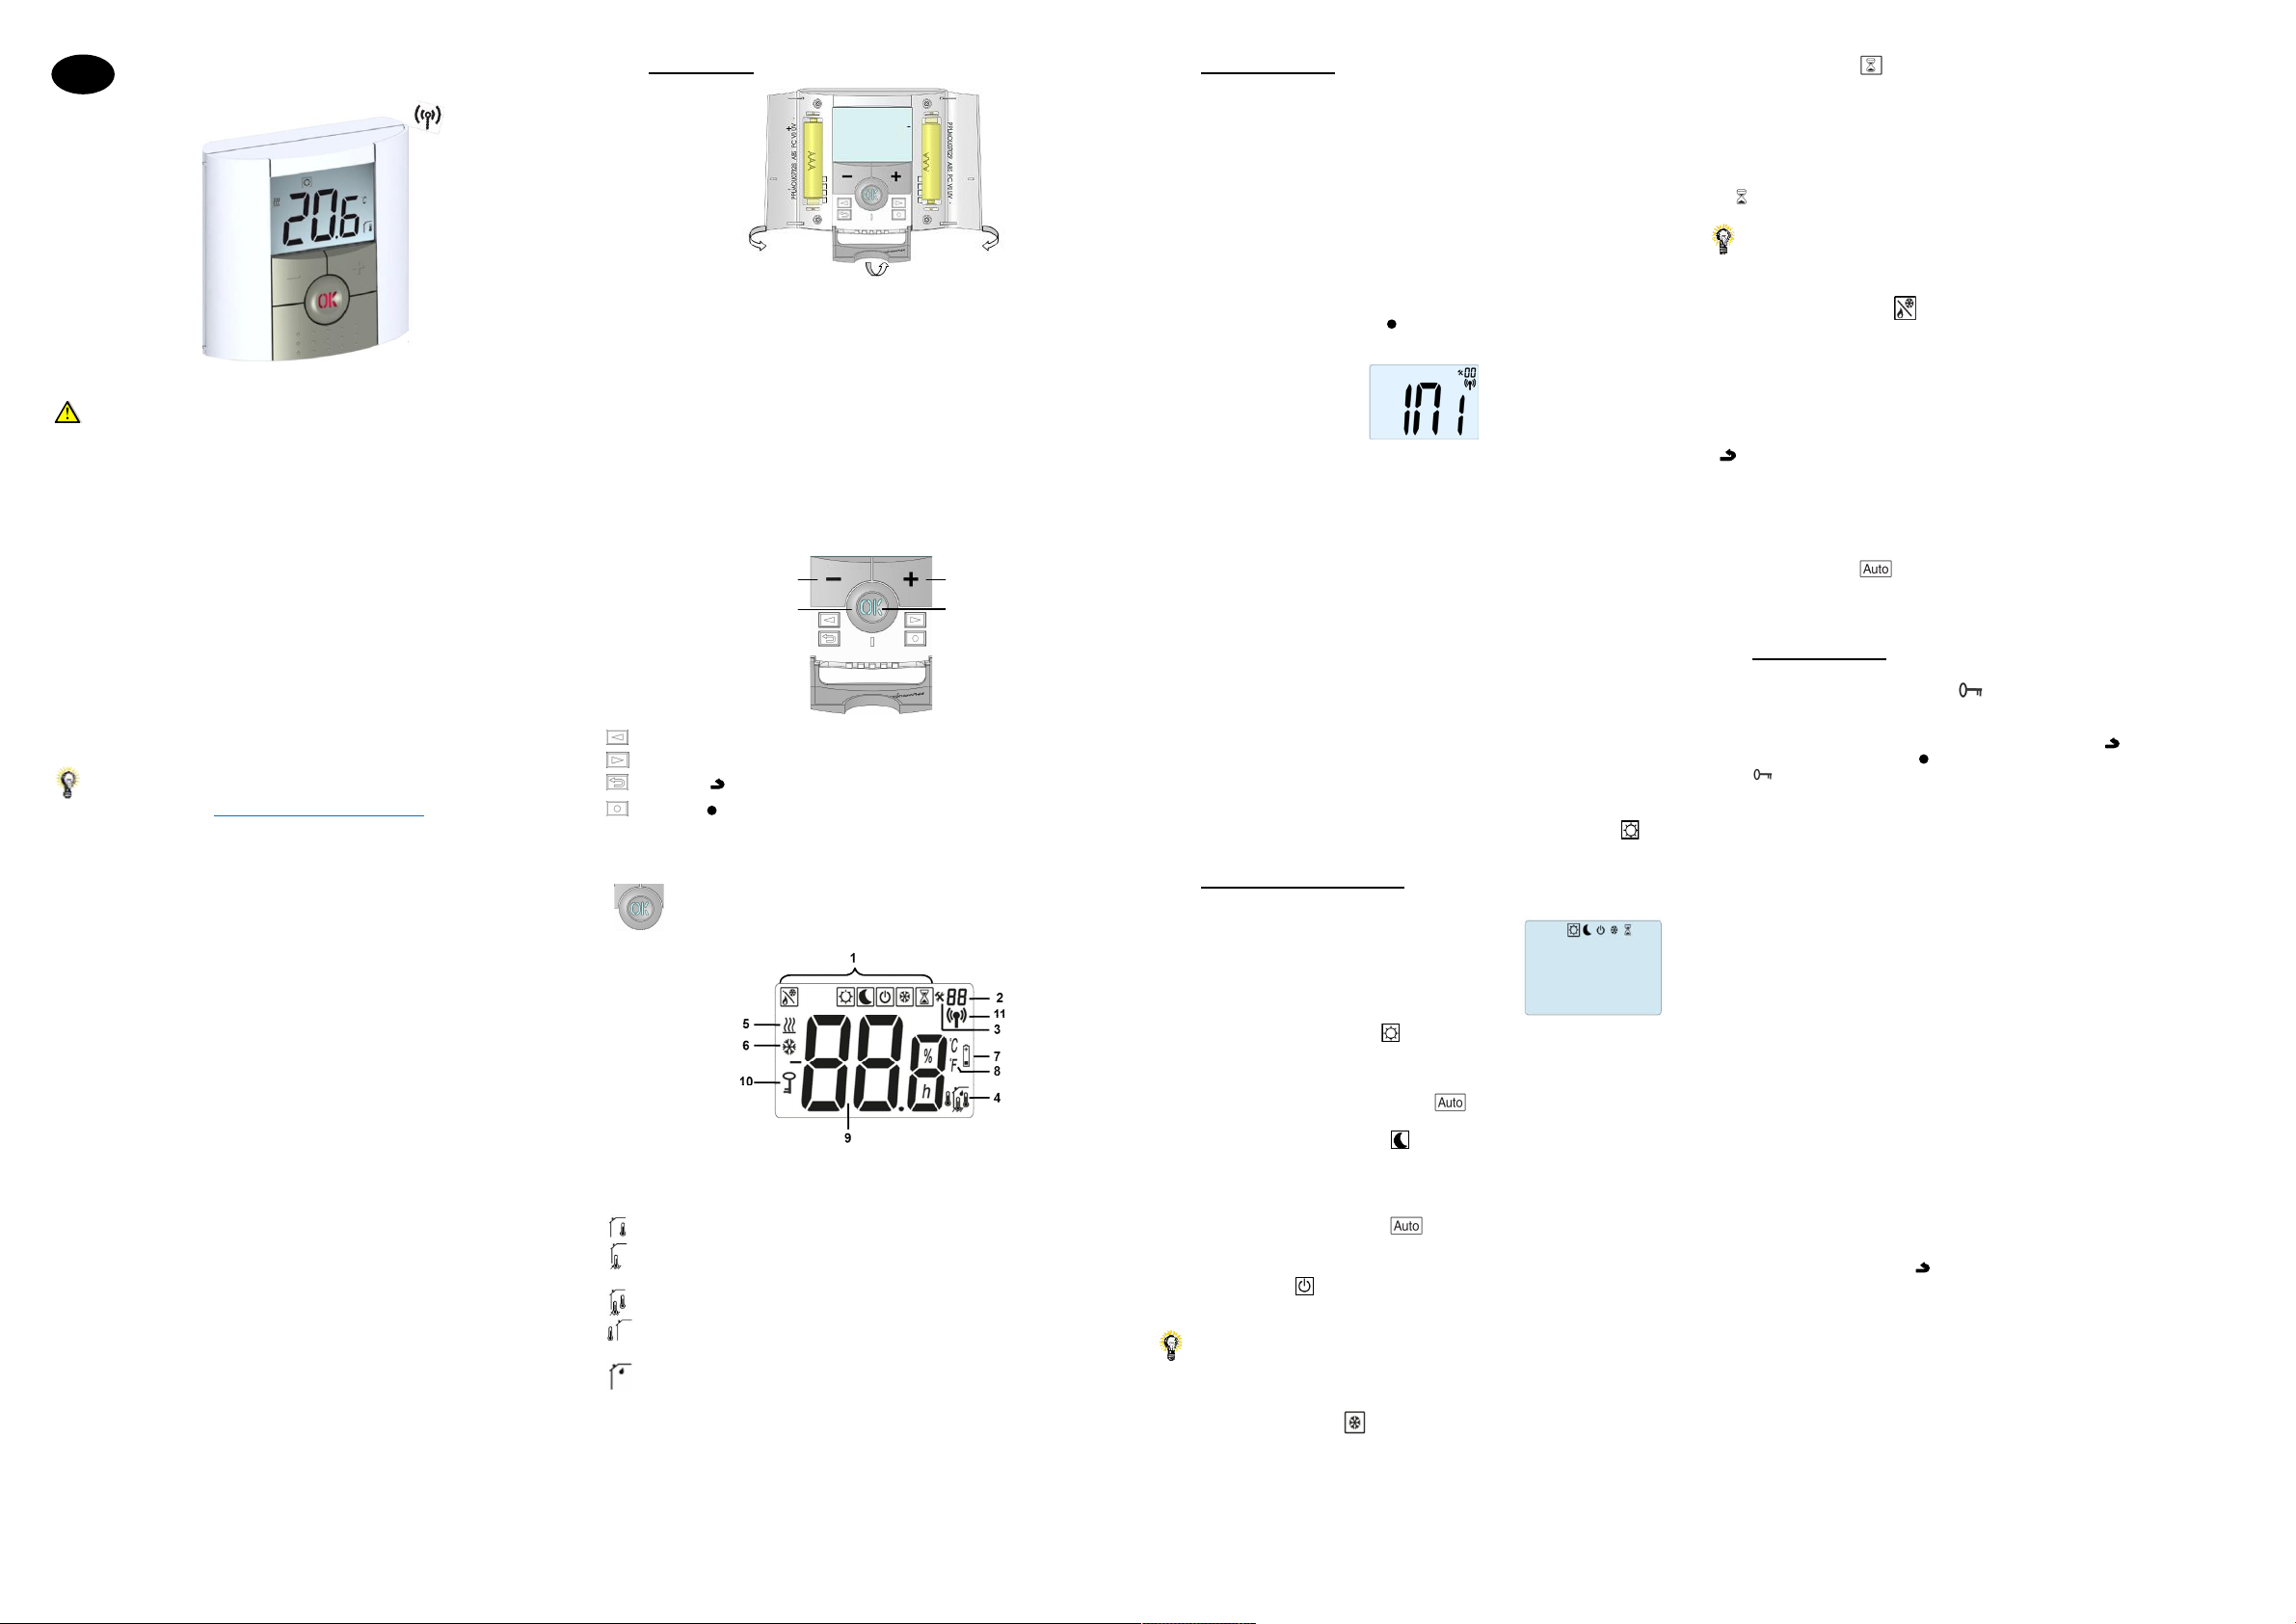
1.1 Keyboard
Left Navigation k(◄)
Right navigation k(►)
Escape key ( )
Edition key ( )
1.2 LED & Display
Color of “OK” LE
Red Fix: heating d
Green Fix: coolin
Green flash: vali
Red flash: error o
1. Operati
2. Paramet
3. Install
4. T
Regul
Regulation => Fl
Regulation => Inter
Regulation => outsid
back of thermost
Visualization of the
5. Heati
6. Coolin
7. Low bat
8. °C o
9. Settin
Give the paramet
10. Ke
11. RF indica
2 First Installation
This section will g
2.1 Batteries installat
- Open th
the small protection sti
- Close the t
2.2 RF installation
Please have a look
Caracteristics sec
2.2.1 With recei
- Fi
RF
compatibles)
- ( ) during »
displayed.
The thermostat
- RF
mode, this is the n
- You can check the R dista Go to the r which must be regulated Put your
thermostat on the final p (On the wall or tab then p t therm i
Comfort mode
to check if the new
- Ret to the th and s it off. C on th r again if it’s also
switched off.
If the RF signals
If the R signals weren’t received correctl check the inst (R position,
distance...) or restaRF init
Remark: T
the receiv d the configuration mode (a m distance of 1 mete m be
respected).
2.2.2 Case of central
The link is done
2.3 Starting
The thermostat is n
3 Working mode definition
Your thermostat has several different work modes to allow you t adjust your unit
according to you
To change the working mode, open the small center
cover (◄) (►) .
the
(OK) to enter in the
3.1 Manual mode C
Manual work
By pressing (- or (+) k comfo setting tempe sta to blink and can be
adjusted.
Remark: Setpoi
mode
3.2 Manual mode Reduced
Manual work
By (-) or (+) k the reduced temperatu blink can
adjusted.
Remarks:
- Setpoint in Re
mode
- In cooling mode, Re
3.3 OFF mode
Use this mode if
Be Careful: In this mode
At (Ok) ke
current temperatu
Remark: To exit t (◄) or ( .
3.4 A
Use this mode if
- The anti setti temperat is fix and can be ad in the parameter
menu number 06 ‘HG’ , refer to ch
Remark: in cooling mode, Anti-freeze m acts lik the OFF mode (installation is
stopped).
3.5 Timer mode
The T
thermostat will ret
- You can first adjust, t desired s temp w (-) or (+ , press (OK to
validate (Default val
- In d ”
with (-) or (+) , pres (OK) to start th
The
period.
If no ”
with (-) key or us(◄) or (►) .
3.6 Reversible mode
The reversible m
By on (-) selected working mode can be
The user can ch
- Hot : the installation o
- CLd : the installati
During this sel
if cooling is select
By pressing ( key, you validate you selection. B pressi (◄) or (►) key or the
( ) key , you come
Remarks:
- This m is only availabl if the parameter “ h bee set to “RE ( to
chapter 8)
- This mode is not av
3.7 A
This
of the thermost
4 Special function
4.1 Keyboards lock F
Use this function
- T( ) and
simultaneousl( ) .
- The “ ” logo
Repeat the sam
4.2 Open windo
This function is a to stop heating if thermostat d an unusu decrea of
temperature (open
Principle:
If the displayed tempe (internal or ambient sensor decreases b 3°C or more
during 5 period less), the thermostat stops heating min the
temperature continues
During this stop, the r
Return to normal m
The thermostat re
The functi can be overridde b pr th (OK) butto durin the stop heating
phase.
The blinking temp
Special cases:
- This function do
- This function do
- If tempe is less than 10°C, th will regulates a 10°C during the stop
phase (refer to ch
- This function does
4.3 Humidity
Thermostats measure
- To regulate the 34 chap
- To protect 35 chapte
4.4 Visualization
W
connected to your thermostat (floor, remote, external). On the main s press
several tim( ) .
screen:
You will see in the
1/ the setting tempe
2/ the ambient t
3/ if the external s
4/ the humidity perc
Remarks :
- refer to chapter
- if Parameter “S ” is set on Air ” (refe
an external sens
Minus Key (-) Plus Key (+)
Validation Ke(OK) Status LED
GB