INSTRUCTIONS FOR USE
GB
DIAGRAM OF THE APPLIANCE (Fig. 1)
A. Handle.
B. Safety lock (if provided).
C. Gasket.
D. Separator (if provided).
E. Defrost water drain plug.
F. Control panel.
G. Side motor cooling grille.
DIAGRAM OF THE CONTROL PANEL (Fig. 2)
1. Red indicator lamp: flashes to indicate an alarm
condition (see section "TROUBLESHOOTING
GUIDE").
2. Yellow indicator lamp: when on, indicates that the
Turbo freeze function has been activated (see section
"TURBO FREEZE FUNCTION")
3. Green indicator lamps: indicate that the appliance in
ON, the set temperature and activation of the fast
freeze function ("Shopping").
4. Setting button: to update the set temperature, to
activate/deactivate the fast freeze function ("Shopping")
and to activate/deactivate the "Turbo freeze" function.
BEFORE USING THE APPLIANCE
Your new appliance is designed to be used in the
household and similar applications such as:
- kitchen areas in shops, offices and other working
environments
- farm houses
- by clients in hotels, motels, residences, bed &
breakfasts.
The product must only be used to store frozen food, to
freeze fresh food and to make ice.
Regulations require the appliance to be earthed.
The manufacturer declines all liability for injury to
persons or animals and for damage to property
resulting from failure to observe the above
procedures and reminders.
1. After unpacking, make sure that the appliance is
undamaged and that the door closes perfectly, with the
gasket remaining intact. Any damage must be reported
to your retailer within 24 hours after delivery of the
appliance.
2. Wait at least two hours before switching the appliance
on in order to ensure the refrigerant circuit is fully
efficient.
3. Installation and electrical connection must be carried
out by a qualified technician, according to the
manufacturer's instructions and local safety regulations.
4. Clean the inside of the appliance before using it.
• Before connecting the appliance to the mains supply,
ensure that the voltage corresponds to that given on
the rating plate located on the rear of the appliance.
• Electrical connections must be made in
accordance with local regulations.
INSTALLATION
• Unpack the appliance.
• Remove the 4 spacers inserted between the door
and the appliance. (Fig 3)
• Make sure the defrost water drain plug (if provided) is
correctly positioned (E).
• For optimum appliance operation and to avoid damage
when the door is opened, leave a space of at least 7
cm from the rear wall and 7 cm at the sides. (Fig 4)
• Fit the accessories (if provided).
SWITCHING ON THE APPLIANCE
• Plug in the appliance.
• The green LED lights up ("Normal").
• The red LED flashes to indicate that the temperature
inside the appliance is not yet sufficiently low for food
storage. The red LED will normally switch off within
the first six hours after the appliance is switched on.
• Place food inside the product only when the red LED
has switched off.
Note: Thanks to the efficient lid seal, the appliance lid will
not re-open easily immediately after closing. Wait a few
minutes before re-opening the lid of the appliance.
TEMPERATURE ADJUSTMENT
lect the desired temperature using the button (4).
To adjust the internal temperature, proceed as follows:
• Press button (4) as required. With each touch of the
button, the set temperature is updated, toggling
between the values "Eco", "Normal", "Intensive" and
"Shopping".
• Select "Intensive" for a colder storage temperature.
• When the appliance is only partially full, it is advisable
to select "Eco" to optimize energy consumption.
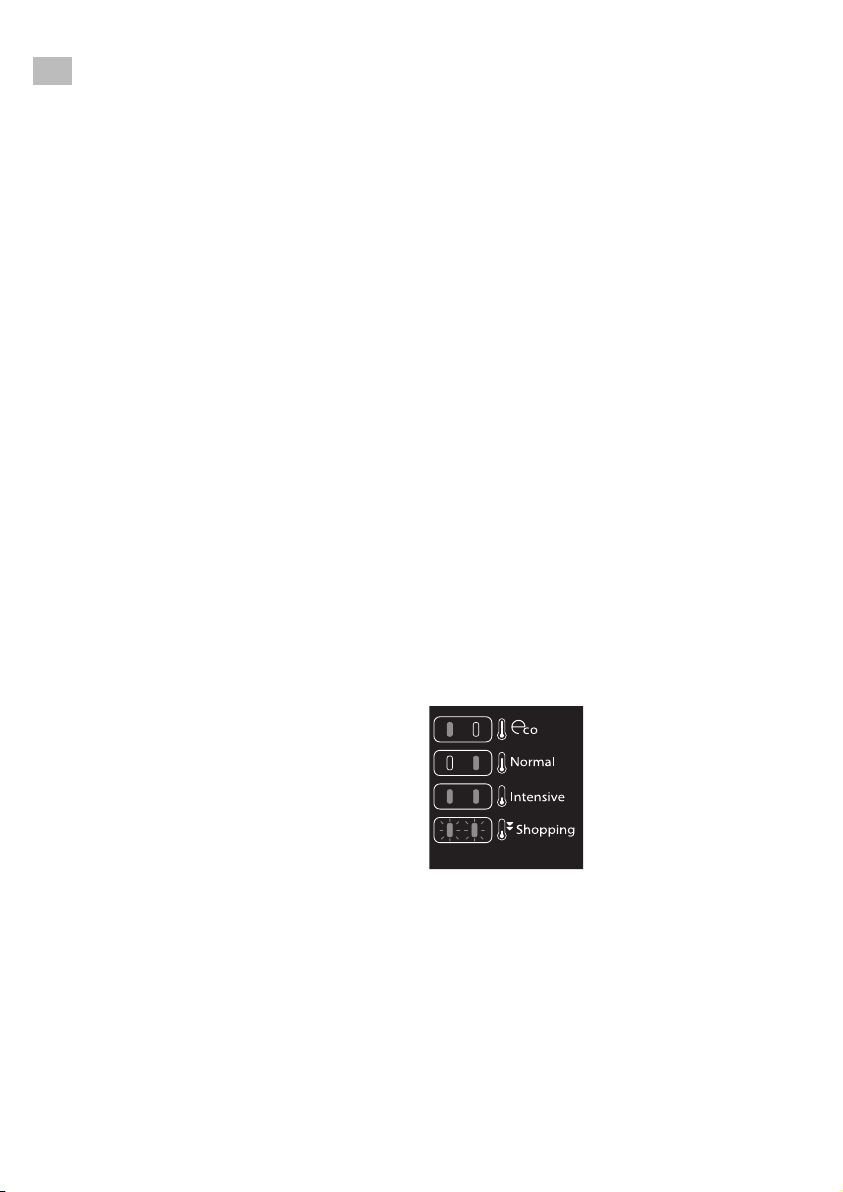
The green indicator lamps (3) indicate the selected setting
according to the following diagram:
Eco: least cold temperature
(left indicator lamp lit).
Normal: intermediate
temperature
(right indicator lamp lit).
Intensive: extra low
temperature
(both indicator lamps lit).
Shopping: Fast Freezing
(both indicator lamps lit). See
section "Freezing fresh food".
Note: In the event of a power failure, the settings (except
for the "Turbo Freeze" function) remain memorised. The
time required for the freezer to reach the set
temperature depends on climatic conditions and the
temperature setting selected;
TURBO FREEZE FUNCTION
The Turbo Freeze function enables a reduction of up to
50% in the time required to freeze fresh food placed
inside the basket provided.
To use the function, proceed as follows:
1. Position the basket provided to the right of the
adhesive sticker shown in the figure.