5
English
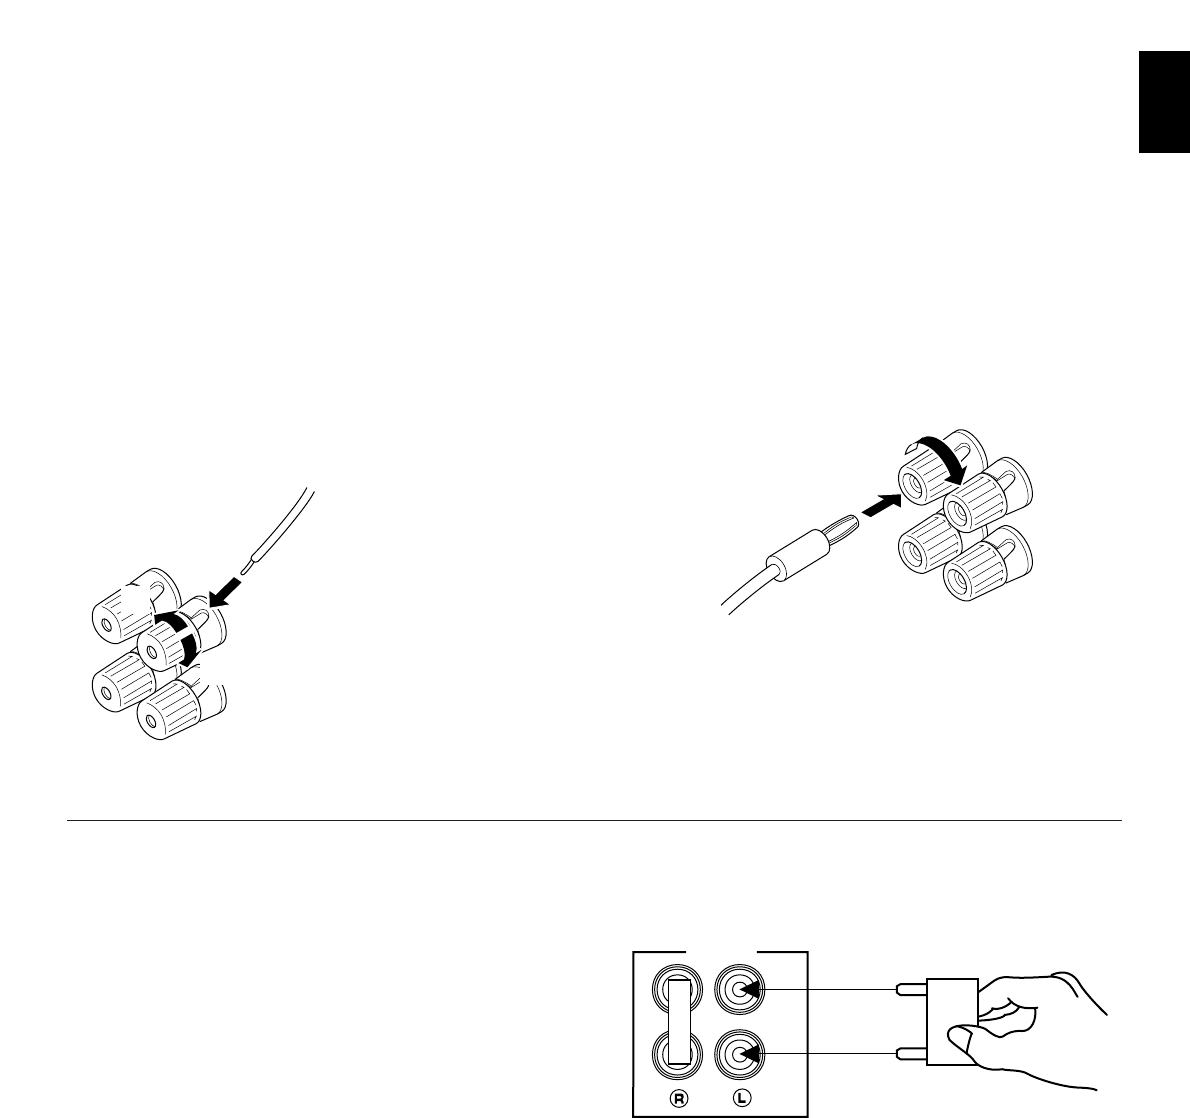
Connect the SPEAKERS terminals to your speakers with wire
of the proper gauge, cut as short as possible. If the
connections are faulty, no sound will be heard from the
speakers. Make sure that the polarity of the speaker wires is
correct, that is, + and – markings are observed. If these wires
are reversed, the sound will be unnatural and will lack bass.
Do not let the bare speaker wires touch each other and do
not let them touch the metal parts of this unit as this could
damage this unit and/or speakers.
How to Connect:
Red: positive (+)
Black: negative (–)
➀
Unscrew the knob.
➁
Insert the bare wire.
[Remove approx. 5mm
(1/4”) insulation from
the speaker wires.]
➂
Tighten the knob and
secure the wire.
●
One or two speaker systems can be connected to this unit.
If you connect only one speaker system, connect it to either
the SPEAKERS A or B terminals.
●
Use speakers with the specified impedance shown on the
rear of this unit.
●
<General model only
>
Banana Plug connections are also possible. Simply insert
the Banana Plug connector into the corresponding terminal.
CONNECTING SPEAKERS
ABOUT THE OTHER REAR PANEL PARTS
REMOTE CONTROL (PHONO) connector
If you have a YAMAHA turntable with a terminal for remote
control, connect it to this connector by using the cable provided
with the turntable. This connection allows you to control the
turntable from the provided remote control transmitter.
GND terminal (For turntable use)
Connecting the ground wire of the turntable to this terminal will
normally minimize hum, but in some cases better results may
be obtained with the ground wire disconnected.
PRE OUT/MAIN IN terminals
Removing the jumper pins enables this unit to independently
perform the functions of a control amplifier and a power
amplifier. These terminals are for connection of a signal-
processing system such as a graphic equalizer or sound
processor.
If a sound processor or other external unit is connected
between these terminals, the VOLUME control of this unit can
be used for overall adjustment of the level of sound.
To connect such a unit, remove the jumper pins from the PRE
OUT/MAIN IN terminals, connect the inputs of that unit to the
PRE OUT terminals and its outputs to the MAIN IN terminals.
For details, refer to the owner’s manual included with the unit
to be connected.
Notes
●
If you will not use the PRE OUT/MAIN IN terminals, never
remove the jumper pins from these terminals. If removed,
no sound will be output from this unit.
●
If you will use this unit with an external unit connected
between the PRE OUT and MAIN IN terminals, make sure
that the PURE DIRECT switch on the front panel is turned
off.
●
If you will use this unit as a power amplifier, connect the
outputs of an external control amplifier etc. to this unit’s
MAIN IN terminals. In that case, this unit’s controls will not
function except the PHONES jack and the SPEAKERS
switches, so use the controls on the external control
amplifier to make volume adjustment etc.