・Is the optimizer microphone firmly connected to this unit?
・Is the optimizer microphone placed in a proper loacation?
・Are there any large obstacles in between the optimizer microphone and the
walls in your listening room?
・The AUTO SETUP procedure starts in 10 seconds after pressing ENTER
on step 7. To achieve the best results possible, evacuate yourself for your
listening room until the AUTO SETUP procedure is completed.
・To cancel the AUTO SETUP procedure after it is started, press RETURN.
・The AUTO SETUP procedure takes about 3 minutes.
Press ENTER to start the AUTO SETUP procedure.
The following screen appears on the TV and the AUTO SETUP procedure
starts in 10 seconds.
The setup screen automatically changes during the AUTO SETUP
procedure.
If any error occurs, the corresponding error message appears on the screen.
In this case, see “Error messages for AUTO SETUP” on page 35 in the
Owner’s Manual and then follow the instructions. To start the AUTO SETUP
procedure once again, press RETURN and then carry out the procedure from
step 5.
When the AUTO SETUP procedure is complete, the following screen
appears on the TV.
*
This is an example of the result screen.
The result may differ depending on the
environment.
Press ENTER.
The result is confirmed and the following screen appears on the TV for 2
seconds and then the menu screen disappears from the TV.
The new settings are automatically saved in the system memory.
Disconnect the optimizer microphone and keep it in a safe place.
Enjoy TV or DVD audio in surround sound.
For instructions on your TV or DVD player, refer to the owner’s manual supplied with each component.
Before carrying out the procedure below, set the volume of this unit to 30. If necessary, adjust the volume level in
step 4.
Enjoying surround sound
Carry out the AUTO SETUP (IntelliBeam) procedure to adjust the settings that
best match your listening environment.
This unit employs the YAMAHA IntelliBeam technology with the aid of the supplied optimizer microphone, allowing you to achieve highly accurate sound adjustments
that best match your listening environment. Be advised that it is normal for loud test tones to be output during the AUTO SETUP procedure. Make sure that there are
no children around in the listening room while the AUTO SETUP procedure is in progress.
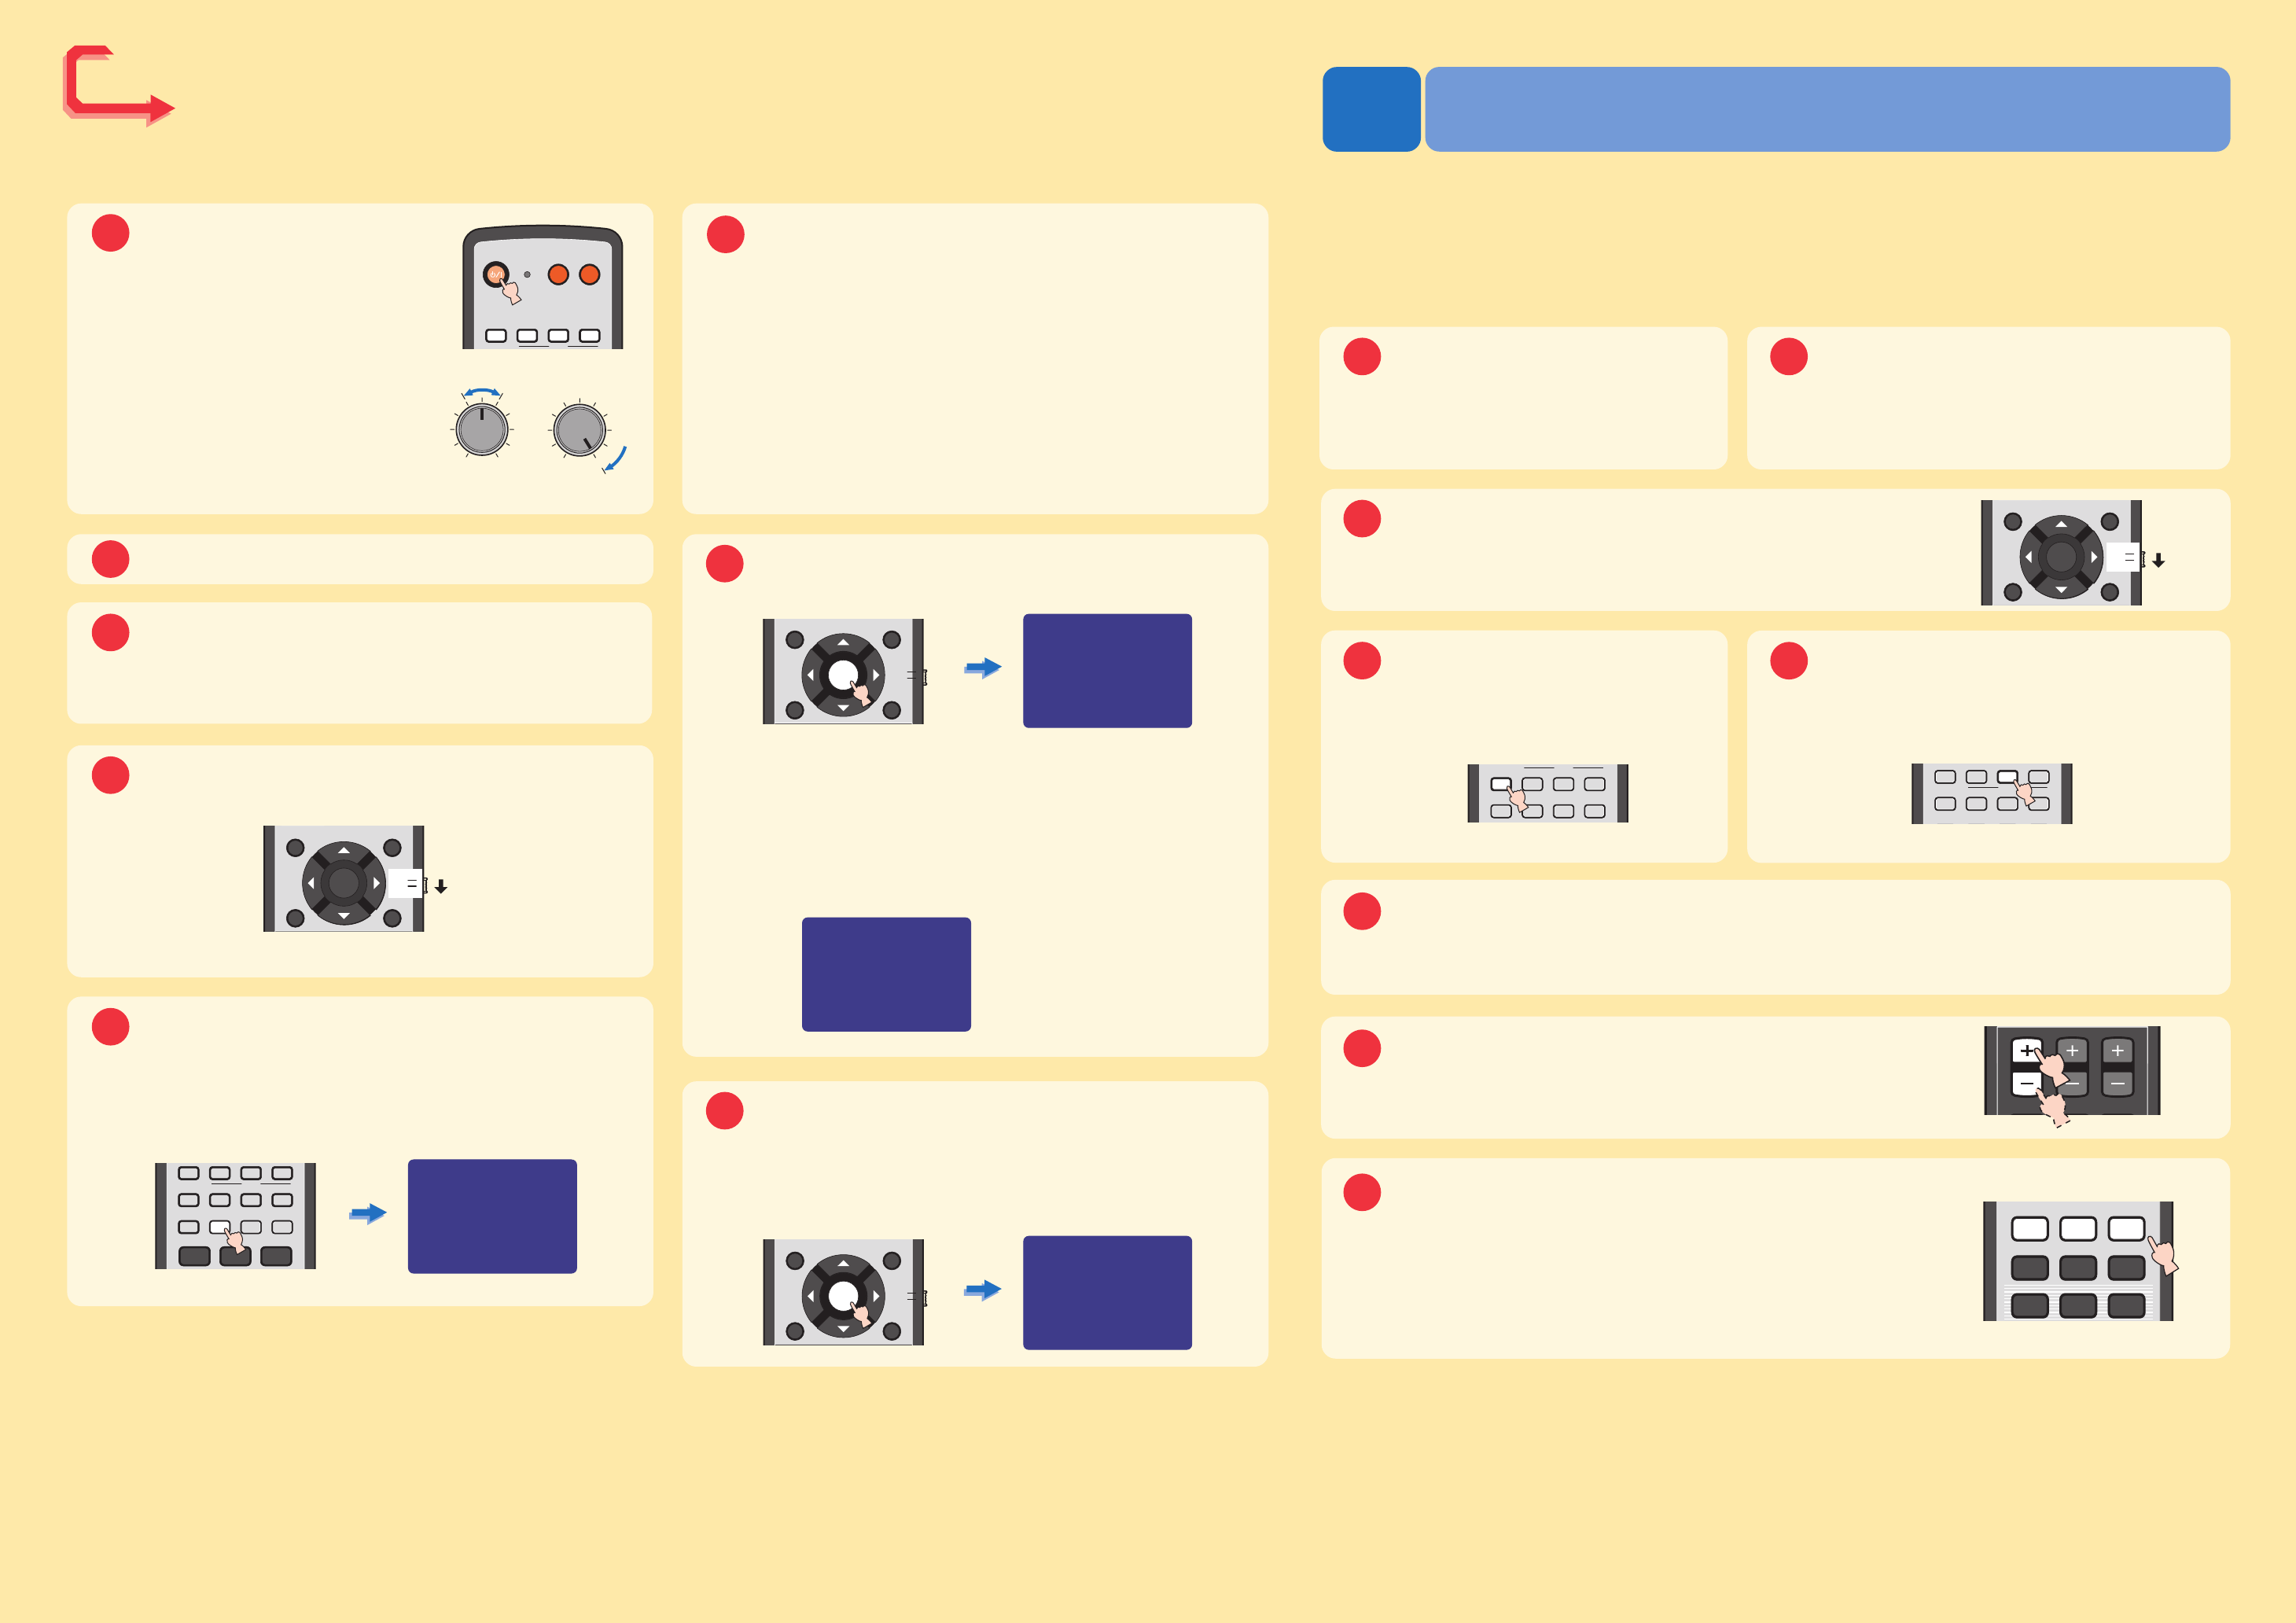
Press STANDBY/ON on
the remote control.
The power of this unit turns on.
If a subwoofer with adjustable volume and
crossover/high cut frequency controls is
connected to this unit, set the volume
between 11 and 1 o’clock as viewed on a
conventional clockface and set the
crossover/high cut frequency to the
maximum.
Turn on the power of your TV.
Select the appropriate video input
on your TV.
Set the operation mode selector to YSP.
Press and hold AUTO SETUP for more than 2
seconds.
The menu screen appears on the TV.
If the menu screen does not appear, check the video pin cable (connection
5 in the diagram on the front page) is connected properly and then press
YSP followed by MENU.
If you hear sound output from your TV speakers, turn down the volume level
until you cannot hear any sound.
Use the remote control supplied with your TV.
Press VOLUME +/– on the remote control to adjust
the volume level of this unit.
Press one of the beam mode buttons on the
remote control to select the desired beam mode.
Select one of the three beam modes that best matches the current input source of
this unit.
For further information on the beam modes, see page 42 in the Owner’s Manual.
To fine-tune the listening environment parameters manually or make advanced settings for
speaker positions, sound beams, etc., see “MANUAL SETUP” on page 60 in the Owner’s Manual.
Libble nimmt den Missbrauch seiner Dienste sehr ernst. Wir setzen uns dafür ein, derartige Missbrauchsfälle gemäß den Gesetzen Ihres Heimatlandes zu behandeln. Wenn Sie eine Meldung übermitteln, überprüfen wir Ihre Informationen und ergreifen entsprechende Maßnahmen. Wir melden uns nur dann wieder bei Ihnen, wenn wir weitere Einzelheiten wissen müssen oder weitere Informationen für Sie haben.
Art des Missbrauchs:
Forenregeln
Um zu sinnvolle Fragen zu kommen halten Sie sich bitte an folgende Spielregeln:
Lesen Sie zuerst die Anleitung;
Schauen Sie nach, ob die Frage bereits gestellt wurde;
Stellen Sie die Frage so deutlich wie nur einigermaßen möglich;
Erwähnen Sie was Sie bereits versucht haben um das Problem zu lösen;
Ist Ihr Problem von einem Besucher gelöst dann lassen Sie ihn / sie wissen in diesem Forum;
Falls Sie reagieren möchten, so verwenden Sie bitte das Antworten- Formular;
Da ihre Frage für alle Besucher sichtbar ist, sollten Sie lieber keine persönliche Daten erwähnen.
Neu registrieren
Registrieren auf E - Mails für Yamaha YSP-1100 wenn:
neue Frage gestellt werden
neue Handbücher vorhanden sind
Sie erhalten eine E-Mail, um sich für eine oder beide Optionen anzumelden.
Das Handbuch wird per E-Mail gesendet. Überprüfen Sie ihre E-Mail.
Wenn Sie innerhalb von 15 Minuten keine E-Mail mit dem Handbuch erhalten haben, kann es sein, dass Sie eine falsche E-Mail-Adresse eingegeben haben oder dass Ihr ISP eine maximale Größe eingestellt hat, um E-Mails zu erhalten, die kleiner als die Größe des Handbuchs sind.
Ihre Frage wurde zu diesem Forum hinzugefügt
Möchten Sie eine E-Mail erhalten, wenn neue Antworten und Fragen veröffentlicht werden? Geben Sie bitte Ihre Email-Adresse ein.