Operation Guide 5394 (OC)
E-39
Precautions about bidirectional calibration
x
sure that they are 180 degrees opposite each other. Remember that if you perform the procedure
incorrectly, you will get wrong bearing sensor readings.
x
E-38
You can use the information in this section to calibrate direction readings, which helps to improve digital
compass accuracy.
Important!
x
using it. The watch may produce incorrect direction readings if you do not perform bidirectional
calibration.
x
generate strong magnetism. Exposure to strong magnetism can magnetize the watch and cause
incorrect direction readings. If incorrect readings continue even after you perform bidirectional
calibration, it could mean that your watch has been magnetized. If this happens, contact your original
retailer or an authorized CASIO Service Center.
Bidirectional Calibration
x
if you notice that the readings produced by the watch are different from another compass.
Northerly Calibration
x
E-37
If your watch has a direction ring...
Example: Advancing to an objective while monitoring your bearing
Using a map, you can adjust the direction ring so the bearing to the objective is at 12 o’clock. Then, even
if you lose sight of your objective, you can refer to the direction ring setting as you progress.
1.
x
surroundings (setting a map)” below.
2.
the map.
3.
x
4.
x N on the direction ring is pointed in the
direction indicated by the second hand (north) as you advance. 12 o’clock of the watch is the
direction to your objective.
Important!
x
ring.
You can align a map with the northerly direction indicated by the watch, and then compare what is shown
on the map with your actual surroundings. This is helpful for checking your current location. This process
is called “setting a map”.
E-36
x
Second Hand indicates magnetic north.
x
Second Hand will continue to move for about 20 seconds after you start the digital compass
operation as it adjusts its magnetic north reading. After that, the hand will stop at the fi
x A again.
x
two minutes.
x B .
Important!
x
Second Hand does not point to 12 o’clock, it could mean that the hand is out of position. Use
the procedure under “To adjust home positions” (page E-56) to correct the hand position.
x
Hour Hand stops at 6 o’clock and the
Minute Hand stops at 12 o’clock, it could mean
that the watch has detected abnormal magnetism. For more information, see “Abnormal magnetism
detection is indicated.” (page E-59).
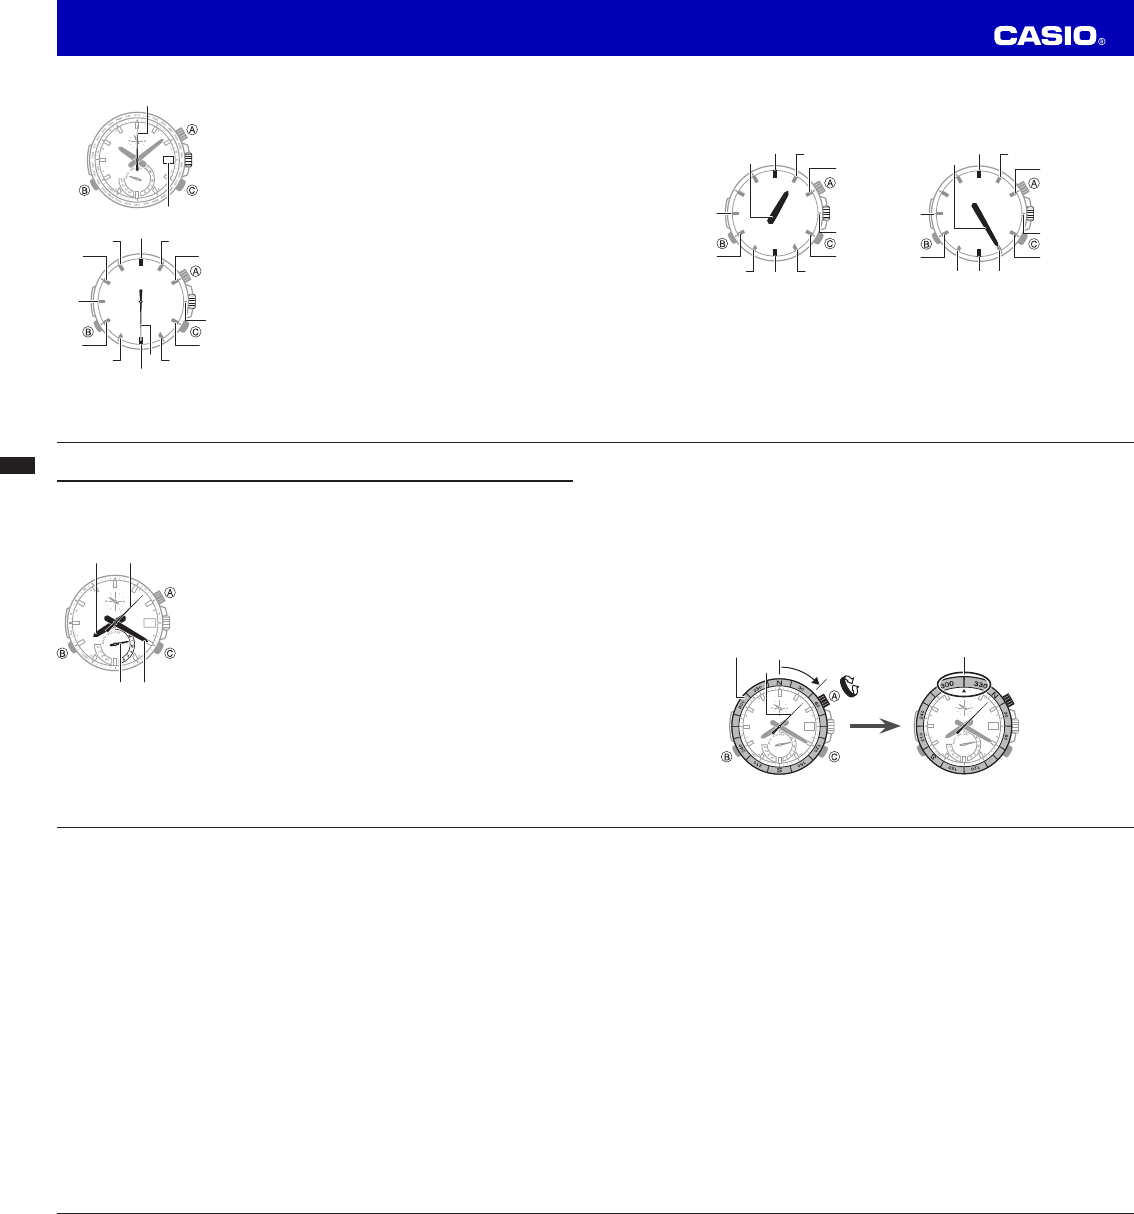
E-35
1.
(in relation to the horizon).
2.
3. A .
x
Second Hand will move to 12 o’clock and the direction reading operation will start. After about
two seconds, the
Second Hand will move to indicate north.
If your watch has a direction ring...
4. A and align N on the direction ring with north, as indicated by the
Second hand .
Take a reading of the desired direction with the 12 o’clock position of the direction ring pointed towards
it.
Direction ring 12 o’clock position of the direction ring: 315˚
E-34
You can use the Digital Compass Mode to determine the direction of north, and to check your bearing to
a destination.
x
Direction Readings” (page E-38) and “Digital Compass Precautions” (page E-42).
Hand Indicators
E-33
8.
x B and then perform the procedure starting
from step 4 under “To change the current time setting manually” (page E-30).
Year setting (ones digit)
0
1
2
3
4
9
8
6
5
7
Year setting (tens digit)
00
10
20
30
40
90
80
60
50
Example: 2015
9.
x
Second Hand starting from 12 o’clock.
Note
x
years. Once you set the day, there should be no reason to change it except after you have the watch’s
rechargeable battery replaced or after power drops to Level 3.
E-32
1.
x
Second Hand to move to the city code of
the currently selected Home City.
2. B for about one second until the watch beeps and the
Second Hand moves to 12 o’clock.
x
3. B twice. This will enter the day setting mode.
x
Day Indicator will move slightly to indicate the setting
mode.
4.
5.
Day Indicator stops moving, press B . This will enter
the month setting mode.
x
Second Hand will move to the currently selected month.
6.
7. B . This will enter the year setting mode.
x
Hour Hand will move to the number that represents the
tens digit of the year and the
Minute Hand will move to the
number that represents the ones digit. The
Second Hand will
move to 12 o’clock and stop there.
Dec
Nov
Feb
Mar
Apr
Oct
Sep
Aug
Jan
Jul May
Jun
Setting the month