50 Ferm
TECHNICAL SPECIFICATIONS
Mains voltage 230 Volt
Mains frequency 50 Hz
Absorbed power 375 Watt
Center height 110 mm
Center distance MD-350 350 mm
Center distance MD-500 500 mm
Max. turndiameter above bed 200 mm
Max. turndiameter above support 115 mm
Culvert and recording main shaft 18 mm, MT-3
Number of speeds main shaft 6
No load speeds main shaft 120-2.000/min.
Automatic start 11 mm; 0,04 - 0,3
Thread cutting (right) 11 mm; M0,4 - M3
Distance toolholder centerline -
measured vertically 15 mm
Rotating plate movement: 3600
Graduation rotating plate: ± 450
Movement tool cut 70 mm
Movement cross slide 115 mm
Movement end slide 350 mm
Graduation slide screws 0,04 mm
Recording and stroke slide tube 50 mm; MT-2
Graduation slide tube 0,05 mm
Weight MD-350 110 kg
Weight MD-500 130 kg.
Sound pressure L
wa
70 dB(A)
Vibration value 2,8 m/s
2
THE MD-350 AND THE MD-500 ARE DELIVERED IN
THE FOLLOWING BASE PERFORMANCE.
Machinebed with prism conductor, ferme head with main
shaft and drive for automatic longitudinal feed and thread
cutting, tail stock with sliding tube and transverse adjust-
ment, electro motor with start/stop- and sense of rotation
switch, support with lock case, combined with
starting/lead screw, cross slide with rotating plate and tool
slide, fourfold tool holder with index pin, 3-chuck with extra
exterior basins and measuring certificate, drive protection
case, 7 change wheels, 3 driving-belts, 2 centers, 3 open-
end spanners, 2 socket head wrenches, catch pin and a
tightening-wrench chuck.
Excluded under-carriage (art. nr.330957).
INSTALLATION
SPACE.
Next to a good maintenance it is very important the machi-
ne is installed drily, as the machine has been built up for de
biggest part of metal. Spaces can become moist by insuffi-
cient or a wrong ventilation, burning not regularly or by
raced walls and lifting moisture. Condensation of moisture
on the metal is caused by suddenly raising the temperatu-
re in a cold space. See that the temperature is equable.
UNPACKING AND INSTALLING
The machine is packed in a strong case which you can dis-
mantle to six flat parts which can be put away easily. These
parts can be saved in case you have to transport the lathe,
for example for repair or for a removal. After you have ope-
ned the case the lathe has to be detached from the pallet.
For this you have to remove two nuts, in each bedfoot one.
Later the nuts can be used again. For lifting up the lathe
you may call in the help of an assistent, this depends on the
weight. Before you begin you have to arrange how to lift
the machine. You should rather put the machine from the
pallet on the permanent destination at one go. The best
thing is to grip the machine at the ends of the bed, so do not
grip it on the heads, transporter, change wheel case or
motor! The apparatus weights roughly 110 kg. For redu-
cing the weight temporary a number of parts can be remo-
ved carefully, like the tail stock, the turning plate with buil-
ding and the discs from iron cast. The lathe has to be level
and it has to be installed on a strong bottom. If you make an
under-carriage yourself you can use a steel U-profile of
sufficient lenght, on which you can sold or screw a leg con-
struction. You can also use a strong wooden lower case
with a strengthened and flat upper blade, for example by
means of a piece of multiple worktop. The conditi on is that
the formation has to be stiff in every directions and that it
cannot fling about, bend or wobble. The lathe is fixed with
two bolts M10 in the special gaps in both bottom plates.
TIP:
You can take the following precautionary measures
for preventing that small roughnesses still cause tension
on the bed if you tighten the two bolts. You draw the place
of the two bottom platesand the two assembling gaps and
you assemble two bolts M10 in the foundation. Put on the
drawn places a layer epoxy filling. Install a plastic foil on
this. See that the bolts stay clear! Then install the work-
bench on the drawn place. Use the two bolts for this as the
conductor. Let down the bed on the foil and then harden
the filling. After that you can provide the bolts with the nuts
which are also used for the transport, and then you can
tighten these ones again.
ELECTRICAL CONNECTION
After the motor has been installed permanently a connec-
tion to the electrical installation has to be made. The ma-
chine has been made for use on the existing 230 Volts al-
ternating current mains and hasn’t a power bigger than ot-
her big household equipment with a motor. Have an eart-
Ferm 3
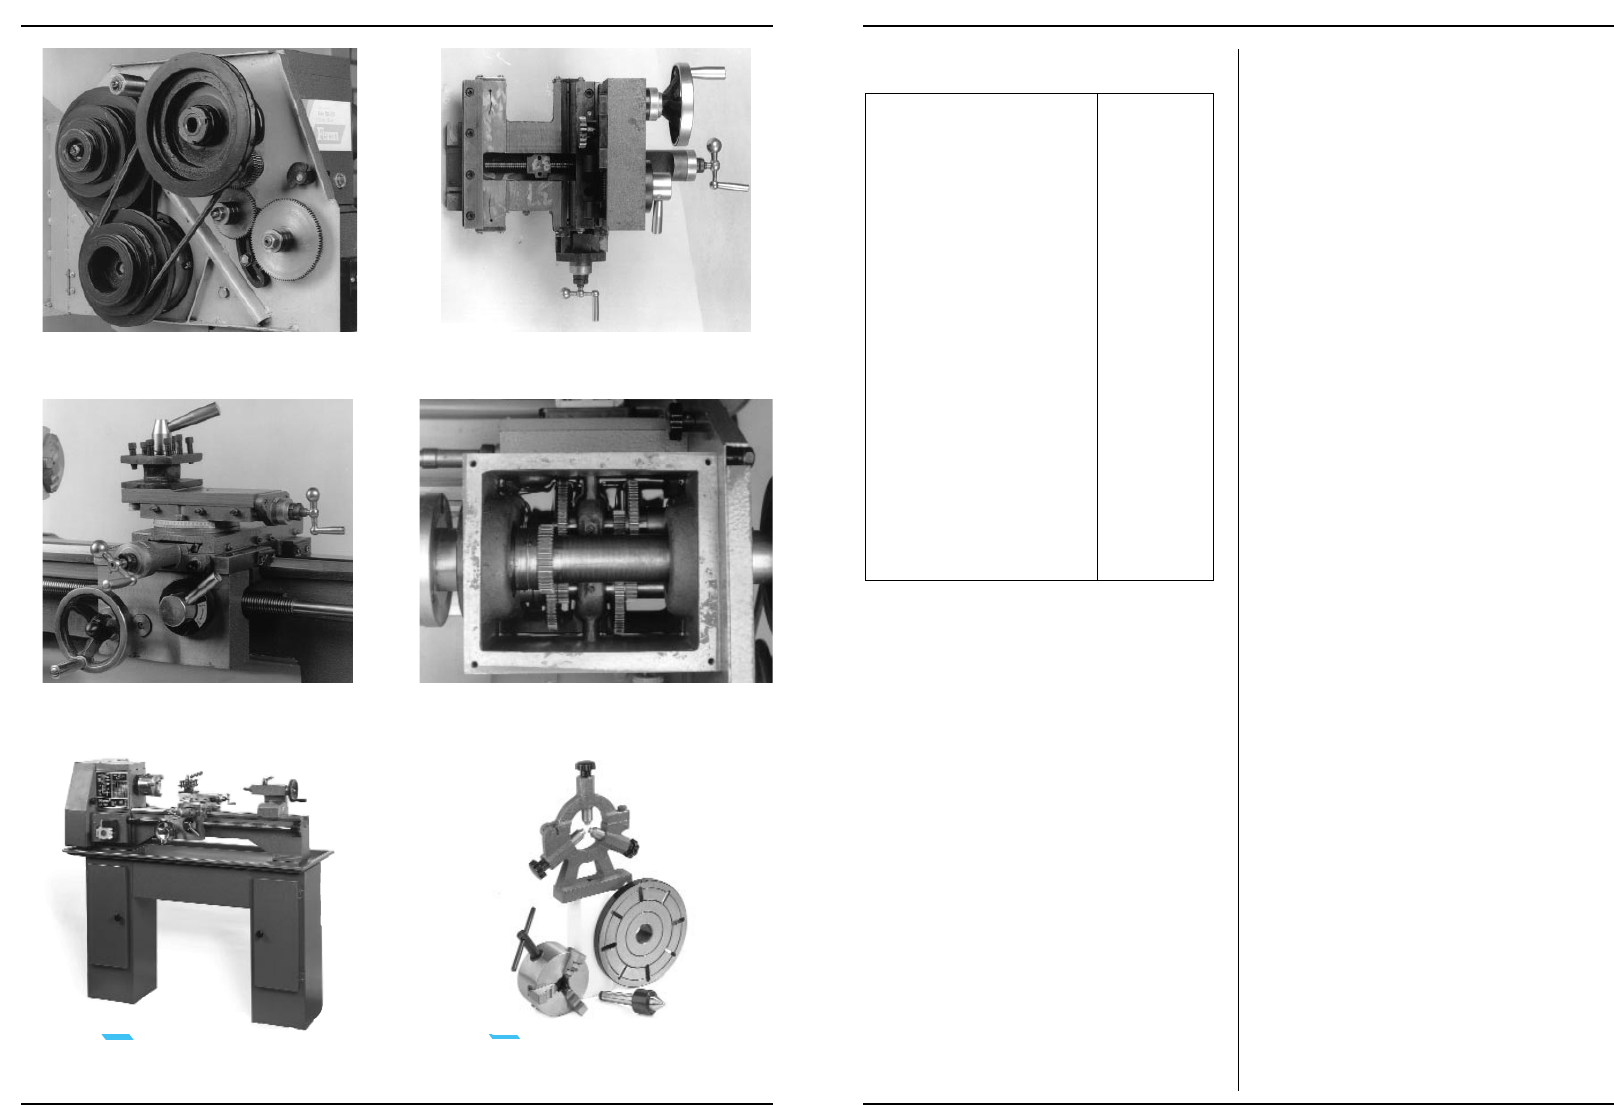
Floor Stand / Unterschrank / Onderstel /
Bas de casse. Art.nr.: 330957
Accessories/Unterteile / Onderdelen /
Accessoires
V-Belt / Riemen / V-Snaar / Courroies t
rapézoïdales
Bottom side Support/Unterseite Support / Onderzij-
de support / Surface inférieure de support
The Suppory/Das Support / Het support /
Le support
Oil bath in gearbox/Ölbad im Zahnräderkasten
Oliebad in de tandwielkast/ Bain d’huile de boîte d’en-
grenage