14 15
12 13
10 11
8 9
- New rain sensor search
The following appears in the rain display if there is no
reception
“ ”
If this is the case, begin a transmitter search by
pressing the [ ] button 2 seconds. This kind of
transmitter search lasts ca. 2 minutes and is always
advisable whenever data transmission is interrupted or
the antenna batteries have been replaced.
- Rain amount display
In the rain mode, press the MODE button or the
MEMORY button to toggle between the following
displays:
- Rain amount of the past hour
- Rain amount of the past 24 hours
- Rain amount of the past 7 days
Tip: The value in the "Rain amount of the past hour"
display can be read as mm/std (or inch/std).
- Deleting the saved rain amounts
Press and hold the MEMORY button until the value
displayed is zero. This resets all rain values in the
display unit to zero.
- Setting the rain unit (mm or inches)
Press and hold the MODE button to toggle between
the two units.
b. If no sensor signal is received within 2 minutes,
( ) appears on the display. Press the [ ]
button for about 3 seconds to trigger a search for the
signals of the external sensor.
This is how you synchronize reception and
transmission signal between outdoor sensor and the
main unit.
c. Once the DCF time signal is received, time and date
appear automatically on the display.
- PREPARATION OF EXTERNAL
TRANSMISSION UNITS
1. Remove the cover of the battery compartment.
2. Set the desired channel via the sliding switch.
3. Insert 2 batteries (1.5V, UM-3 or AA) according to
the respective polarities as shown.
4. Press the RESET button (e.g. with a paper clip).
5. Replace the battery compartment cover and tighten
the screws.
- PREPARATION OF RECEIVER UNIT
1. Carefully open the cover of the battery compartment.
2. Insert the 2 batteries (1.5V, UM-3 or AA) according
to the respective polarities as shown.
3. Close the battery compartment.
- WALL MOUNT OR ON-TABLE POSITION
The receiver unit comes with a support on the bottom
which clicks into place, enabling the unit to be placed
on a flat surface.
- "DEAD" BATTERY DISPLAY
Whenever it is time to replace the batteries, an [ ]
indicator next to the indoor temperature display
(receiver unit batteries) or outdoor temperature
(transmitter unit batteries) lights up.
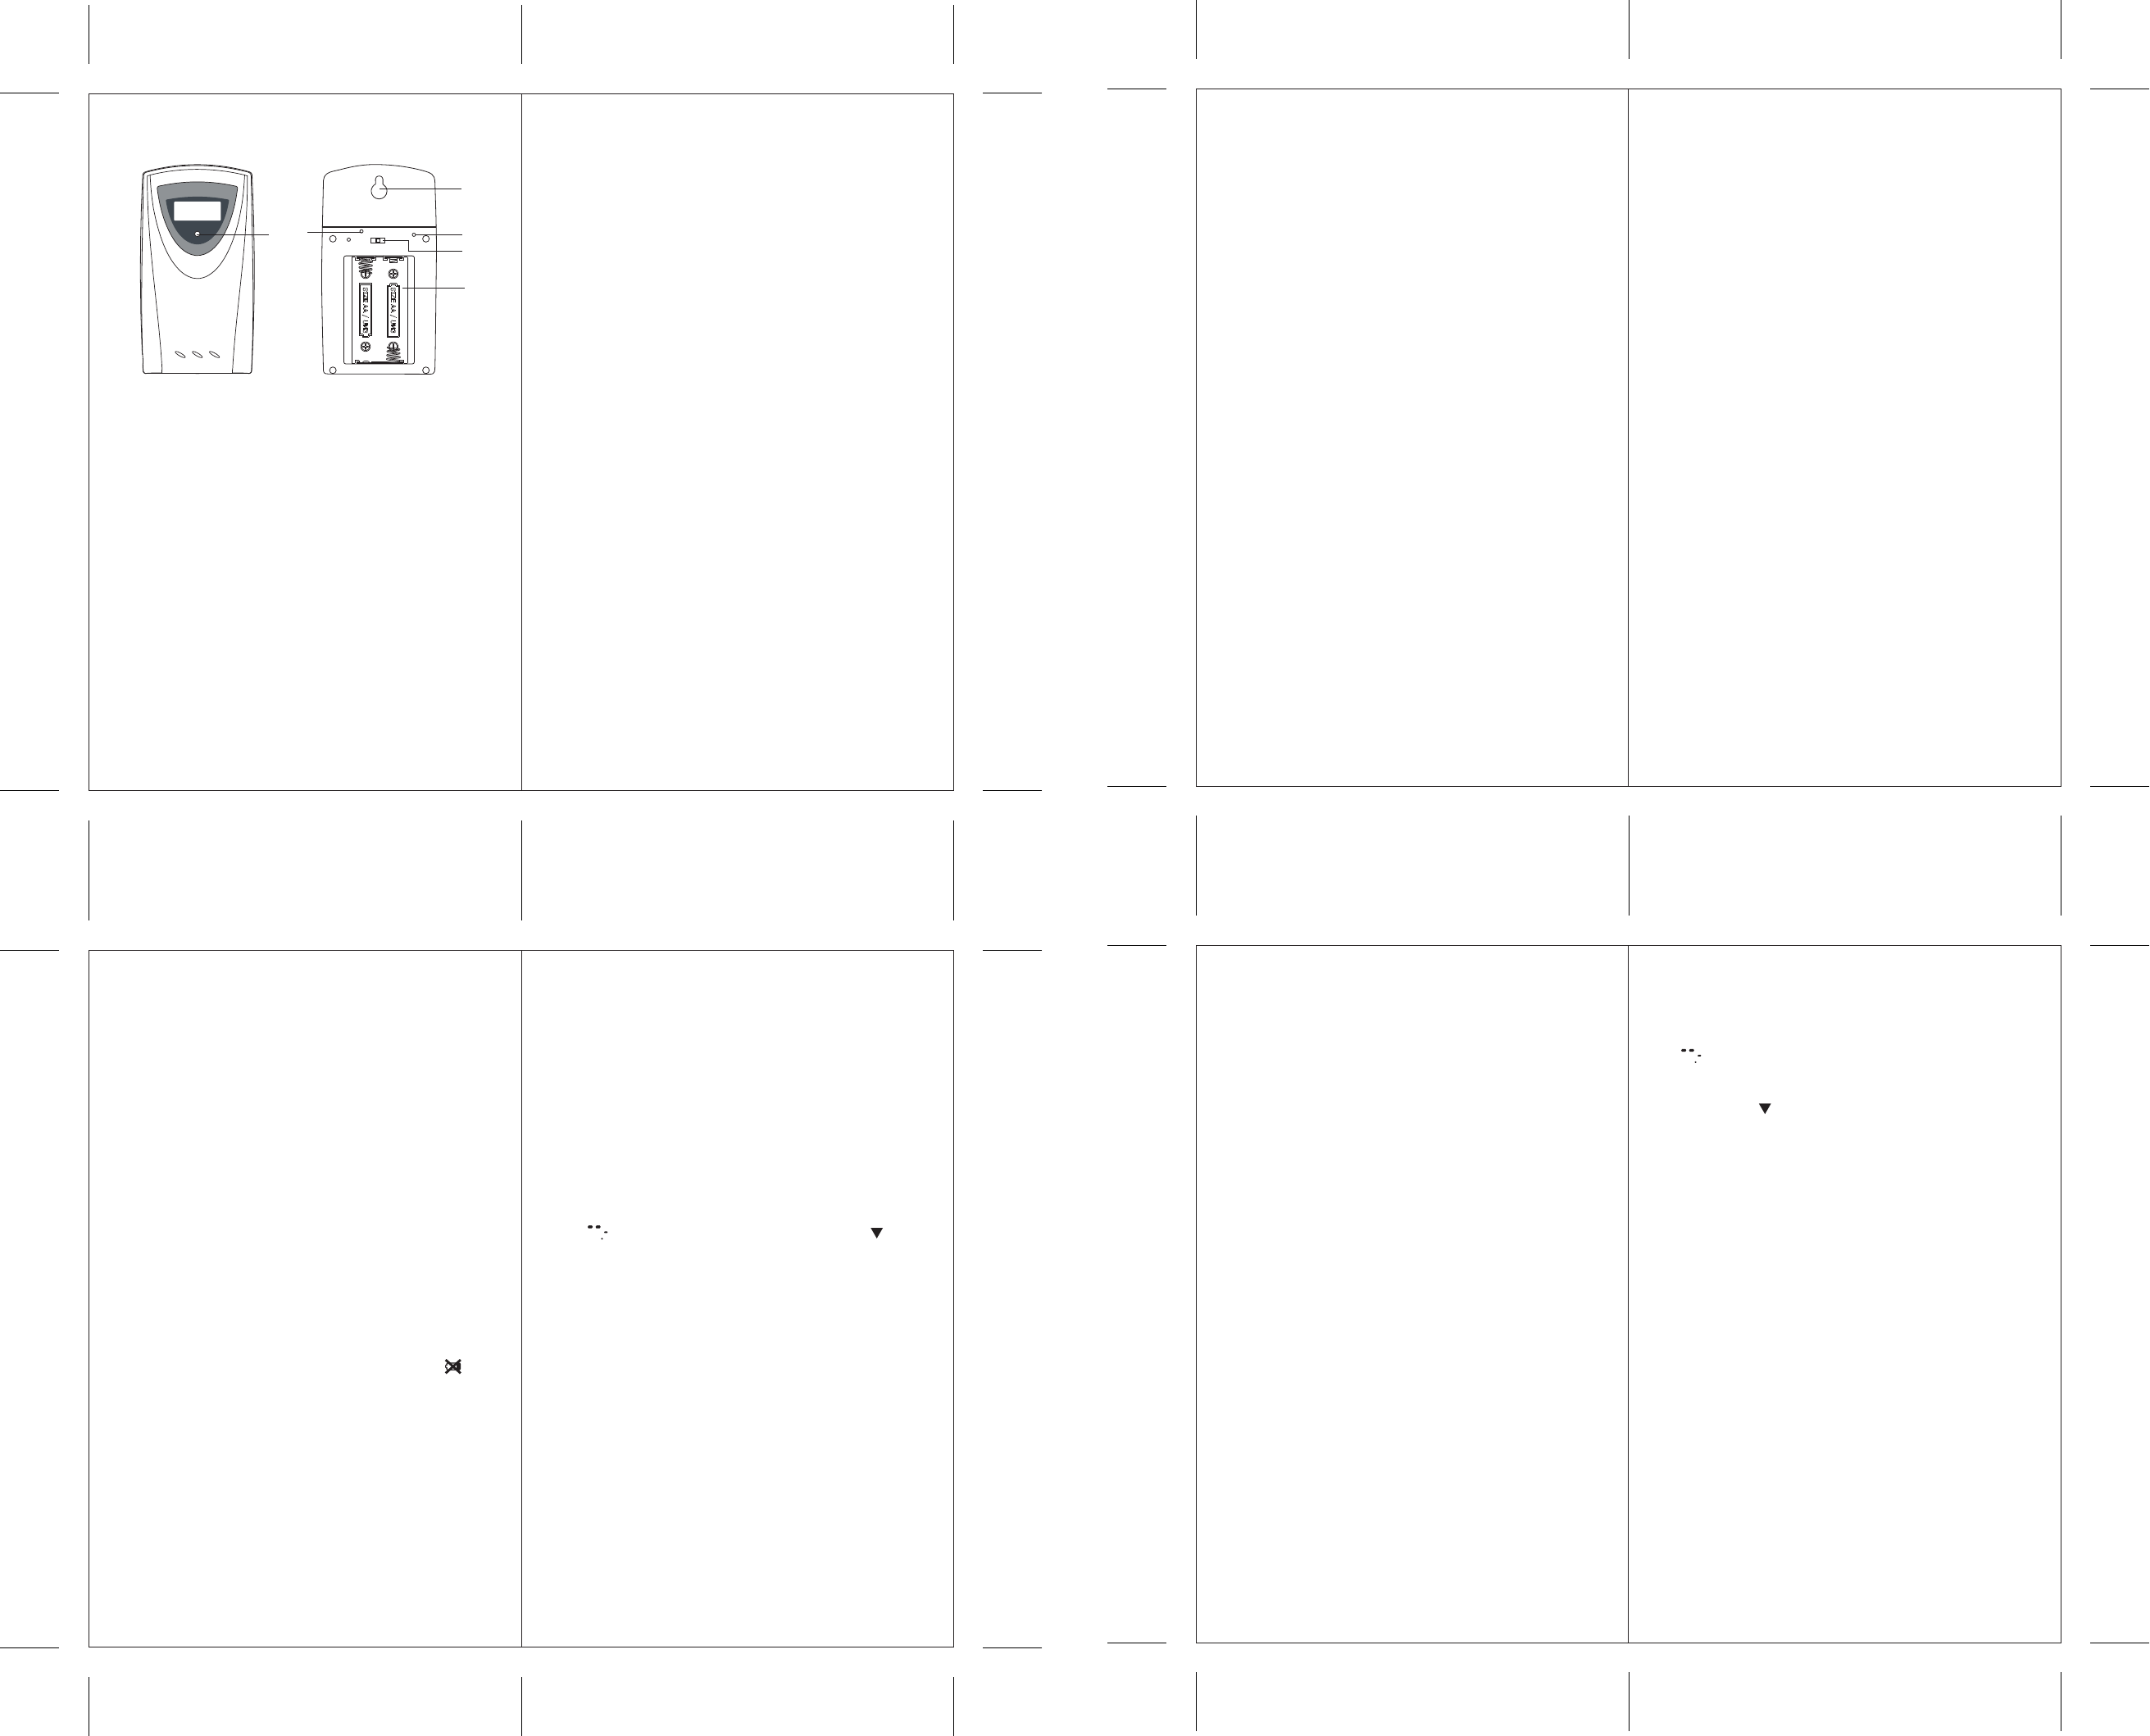
TRANSMISSION UNIT FEATURES
˚C
2. PUTTING INTO OPERATION
- BEFORE USAGE PLEASE NOTE THE
FOLLOWING
Please note the following in order to ensure optimal
device operation:
1. Assign each external transmission unit its own channel.
2. First insert the batteries into the transmission units and
press [RESET]. Then insert the batteries into the
receiver unit.
3. Position the receiver unit and transmission within 1
meter of each other and wait until the measurement
value appears on the display.
4. Then position the receiver unit and the external
transmission units within the viable range of the
devices – i.e. a maximum of 30 meters from each
other.
Please note that the actual range of the transmissions
depends upon the construction materials used in the
building as well as the respective position of the external
transmission unit and external conditions (various radio
transmitters and other sources of interference) may also
serve to greatly reduce the 30-meter range. In these cases,
we recommend locating other positions for both the
transmitter and the receiver. Sometimes changing
position by just a few centimeters is all that it takes!
Although the external transmission units are
weather-proof, they should not be positioned where they
are exposed to direct sunshine, rain or snow.
A
C
B
D
F
E
RESET
CHANNEL
1 2 3
WIRELESS THERMO • HYGRO
3 . PUTTING RAIN SENSOR INTO
OPERATION
1. Release the funnel on the top surface of the rain
sensor by opening the seal with the knobs on the side
(turn left).
2. Raise the funnel from the lower part of the rain sensor
3. Open the battery compartment at the funnel and insert
2 AA 1.5V batteries according to the respective
polarities. Close the battery compartment.
4. Fasten the lower part of the rain sensor somewhere
where precipitation can fall directly into the sensor.
Make sure the sensor is fastened in a horizontal
position. There is a little spirit level on the inside of
the lower part to help you.
5. As soon as the lower part of the sensor is fastened
correctly, put the funnel back in and lock it using the
two knobs.
6. Attach the protective strainer onto the top of the
funnel.
Positioning Tips:
The rain sensor should be attached in an open area
away from walls, fences, trees and any other obstacles
that might either lessen the precipitation amount or
cause precipitation flow from accumulated rainwater
(e.g. trees and roofs).
Please also make sure that precipitation can drain off
freely around the spot where the sensor is affixed.
Check regularly to make sure that no water is collecting
in the lower part of the sensor. The rain sensor uses a
magnet for measurement so make sure there are no
magnetic objects near the sensor which would falsify
the measurement.
- Preparation – Putting display unit into operation
1. Open the cover of the battery compartment on the
back of the display unit.
2. Insert 2 AA/1.5V batteries according to the respective
polarities.
3. Shut the battery compartment.
- Display battery status
The battery status of the external sensor is checked. If
"dead battery indicator" appears on the display unit with
regard to the indoor/outdoor temperature, replace the
batteries immediately.
- Leg support / Wall mount
The display unit has a removable leg support.
This can be removed and the device can be wall
mounted using the opening on the back.
The antenna can be set up on a flat surface or wall
mounted using the opening on the back.
4. Putting display unit into operation
- Rain measurement mode
The rain measurement data is transmitted wirelessly to
the antenna.
The display device records the entire rain amount for
the past hour, the past 24 hours as well as the past 7
days.
The rain amount can be displayed in mm or inches.
An audio rain alarm can be set to go off when a certain
amount of rain per day is exceeded.
- Rain data reception
As soon as the 2 batteries are inserted into the rain
measurement unit, the sensor starts to transmit rain data.
As soon as data is received successfully by the display
unit, this data is available on the display.
A LED INDICATOR
Blinks once briefly during transmission of
temperature data. Blinks twice when the sensor
battery is weak
B BATTERY COMPARTMENT
C RESET BUTTON [RESET]
D CHANNEL SWITCH
Set the transmission unit to a channel (1, 2 or 3).
E HOLDER FOR WALL MOUNTING
F °C/°F BUTTON
Not available on all devices
- SETTING THE EXTERNAL
SENSOR -TEMPERATURE - AND RADIO
CLOCK
a. As soon as the batteries are in the outdoor sensor,
the outdoor sensor starts to transmit measurement
values at ca. 45 second intervals. The main unit also
begins to search for signals as soon as the batteries
are inserted (for about 2 minutes). Once the signal is
received from the outdoor sensor, the outdoor
temperature is shown on the display. The main unit
automatically adjusts measurement values every 45
seconds.