22 23
20 21
18 19
16 17
7 . THERMOMETER (buttons on back)
- GETTING OUTDOOR TEMPERATURE
Press the [CHANNEL] button to display the individual
channels of the external transmitter units successively.
The reception indicator above the channel number
display provides information on each channel's signal,
as described below. If the measured temperature or air
humidity exceeds or falls below the measurement range
or there is no reception, the following indicators appear
in the display: “ ”, “HHH” or “LLL”.
This device can be set so that the values measured by
the external sensors are automatically retrieved and
displayed. The value of each channel is shown ca. 6
seconds and then the measurement values of the next
channel is shown.
- Activate scan mode for external sensors:
Press the [CHANNEL] button 2 seconds.
The symbol now appears
- Deactivate scan mode for external sensors:
Press the [CHANNEL] button 2 seconds.
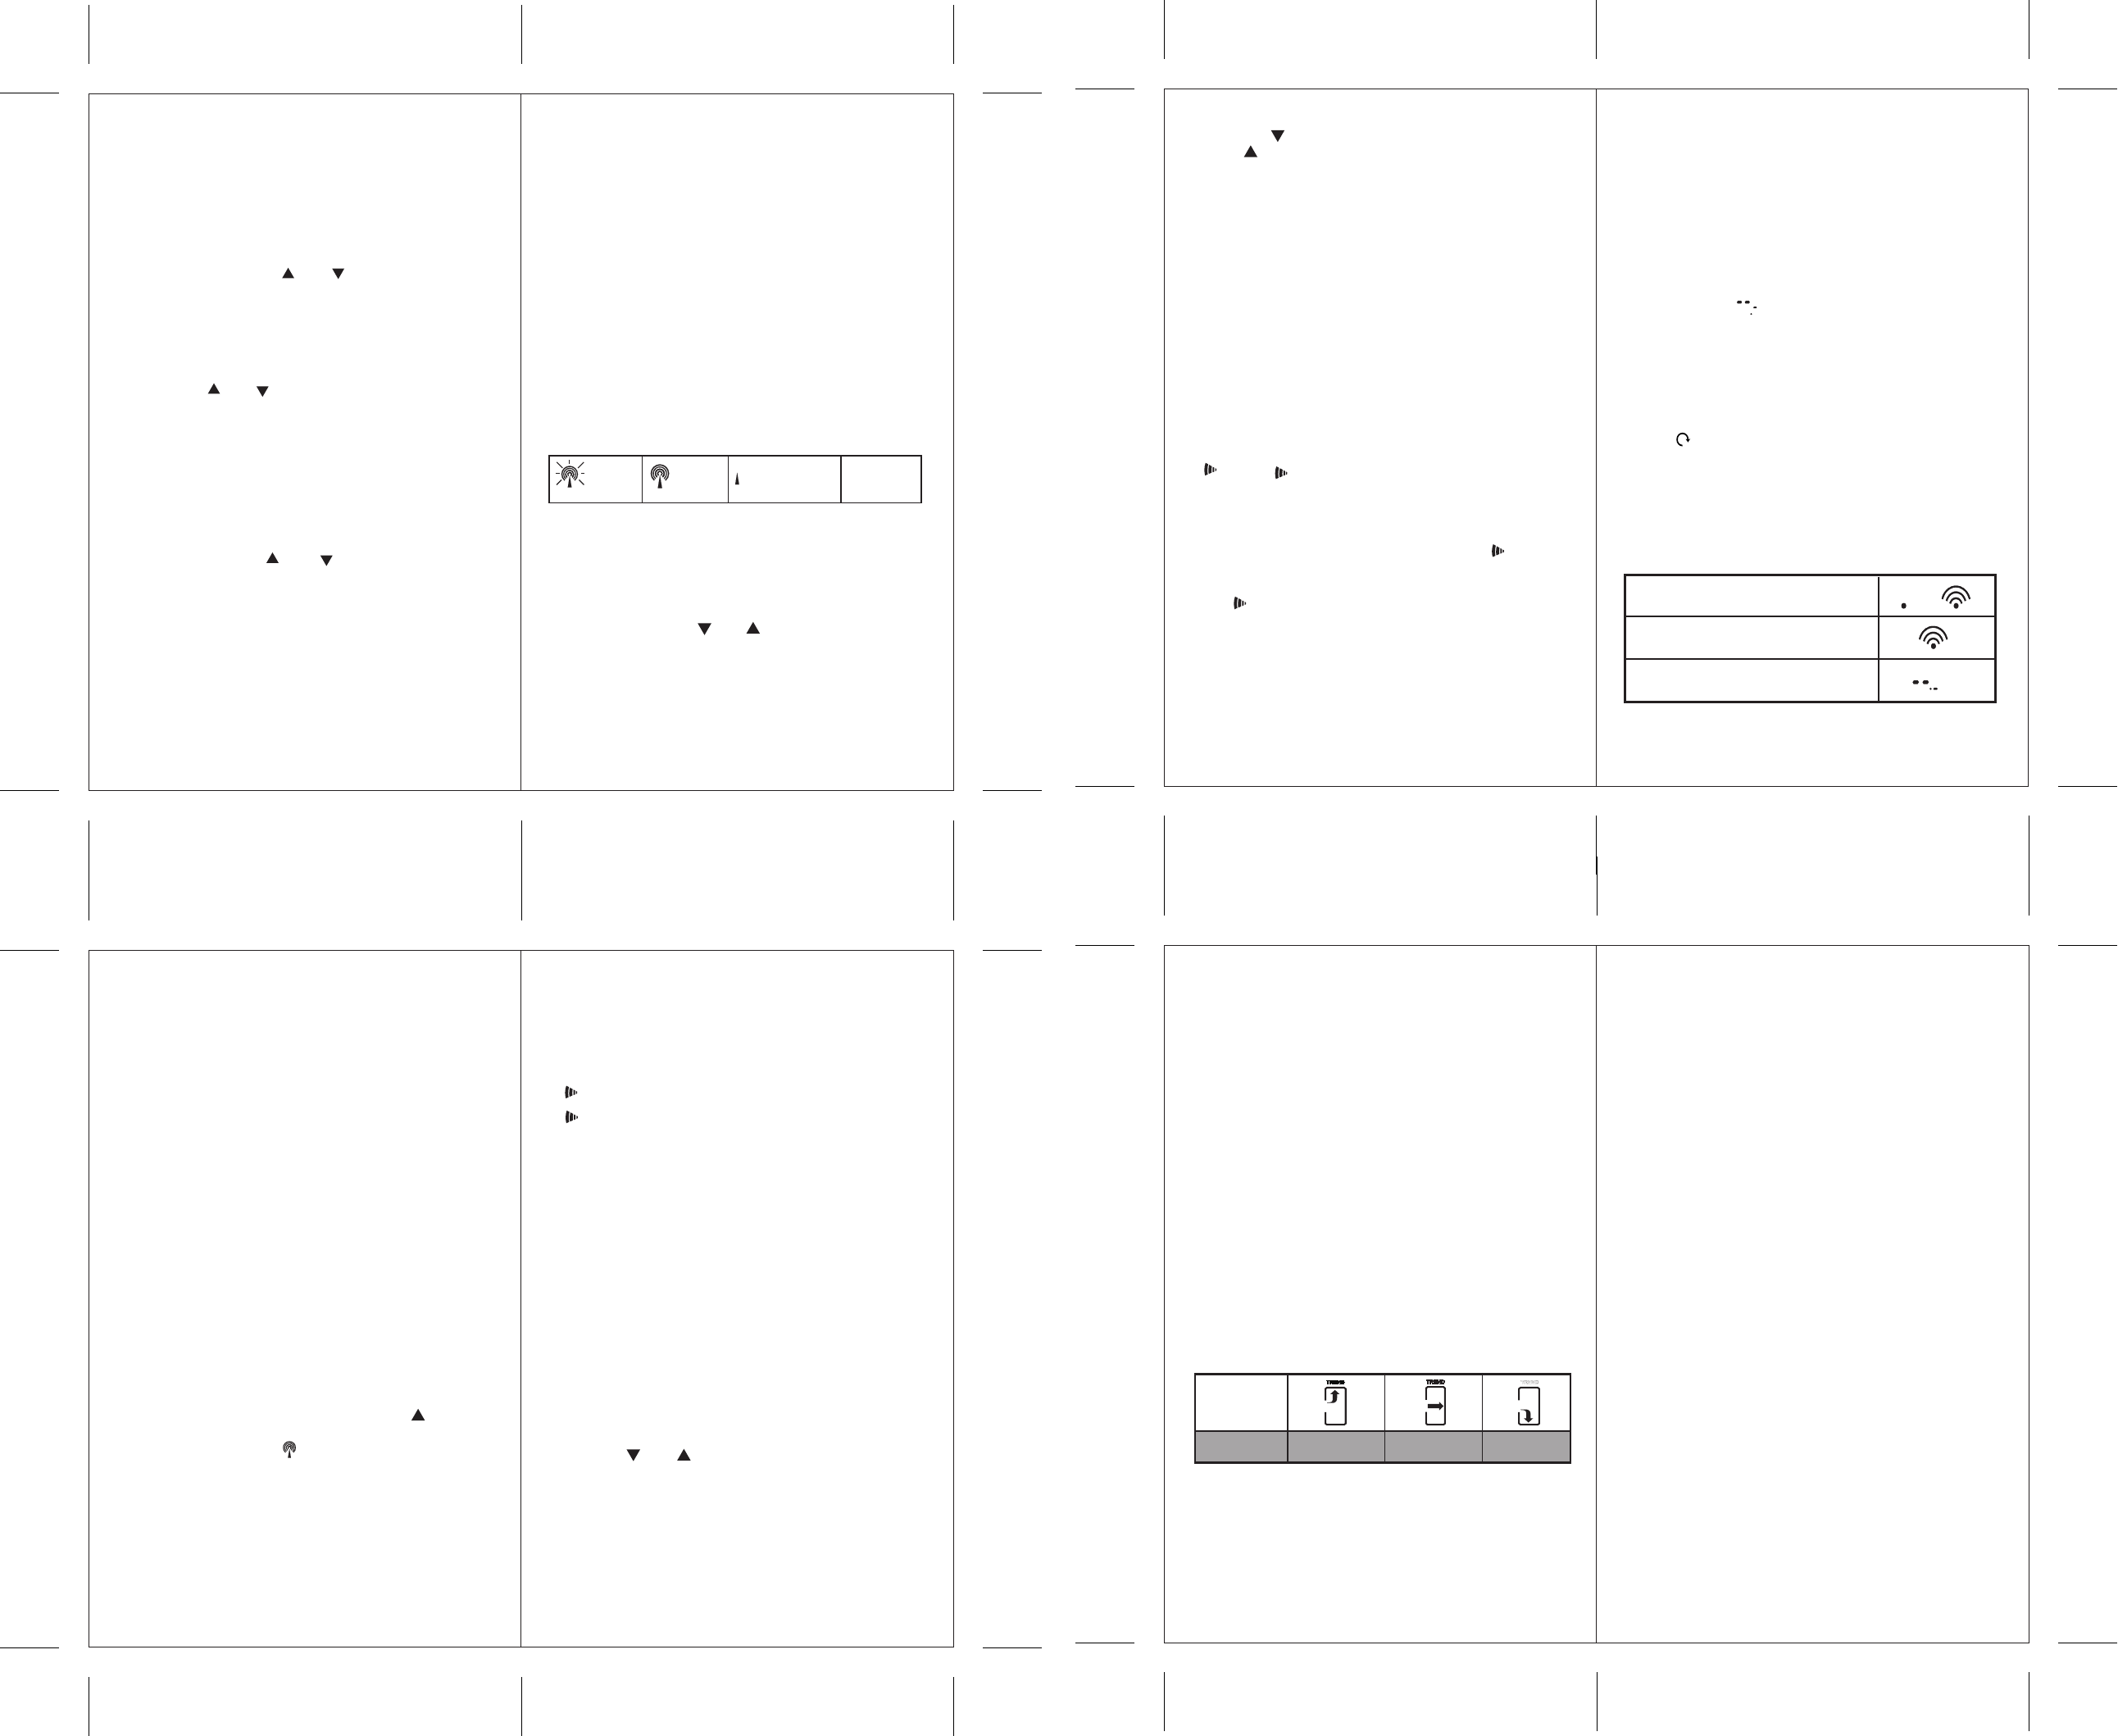
- READING THE “WAVE” INDICATOR
The “Wave” indicator shows the status of the reception
device with regard to the signals. Three various displays
may follow:
6. Use the [ ] button to switch off the alarm you set or
the [ ] button to switch it on. "OFF" is shown when
the alarm is switched off, the wake-up time is shown
when the alarm is switched on.
7. After completing your settings (press [ALARM]
again), the symbol of the corresponding alarm
activated appears.
Warning: Setting the pre-alarm time is done using the
same steps. You must, however, select one of the
predefined times ranging from 15 to 90 minutes.
- SNOOZE FUNCTION
If the [SNOOZE] button is pressed while an alarm is
going off, the alarm will stop sounding. The alarm will
go off again after 8 minutes. The wake-up signal goes
off for 2 minutes if no other button is pressed. Then the
automatic snooze cycle is activated. After the 2 minute
wake-up signal goes off 3 times or after 3 snooze cycles
(pressed 4 times), the alarm clock automatically does
" " or " " as is described in the following
section.
- TURNING OFF AN ALARM
If you press the [ALARM] button (on the back) while
the alarm is going off, the alarm stops. The " "
function keeps the alarm activated so that it will go off
again at the time selected on the next weekday.
The " " function deactivates the alarm and it will not
go off on the next day. To do so, the alarm will have to
be reactivated!
6. ALARM CLOCK
- SETTING AND ACTIVATING THE WAKE-UP
FUNCTION
The alarm clock has three different alarm functions:
" " : Weekday alarm. This alarm will go off every
Weekday (Monday – Friday)
" " : Single alarm. This alarm goes off just once.
This function is ideal for the weekend (SAT,
SUN), but can be used any day
"Pre-Al" : Pre-Alarm. This is to be woken up earlier
should the outdoor temperature drop to 0°C or
lower. The following wake-up time delays can
be selected:
15, 30, 45, 60 or 90 minutes. The
"Pre-Alarm" can be used with both of the
above alarm functions but only if at least 1
alarm has been activated. This function is
only useful if the channel 1 antenna is really
outside.
Setting alarm time:
1. Use the [ALARM] button to select the alarm function
you wish to set. You may choose from the three alarm
functions described above
2. Press the [ALARM] button 3 seconds. The hour
portion of the wake-up time starts blinking.
3. Use the [ ] or [ ] buttons to select the hour of the
alarm time.
4. Press the [ALARM] button again and set the minutes
of the alarm time.
5. Finally, confirm alarm-time selection by pressing the
[ALARM] button again.
- Display language (English-En, German-DE,
French-Fr, Italian-IT or Spanish-SP)
- Temperature display in °C or °F
- Year
- Calendar (Month – Day – display format)
(Day/Month or Month/Day)
- Time format 24hr or 12hr
- Time (hours – minutes)
The last time the [MODE] button is pressed, the setting
function is concluded.
When “ZONE” time is displayed, you can make the time
setting according to the relevant time zone (press
[MODE] button 3 seconds).
- TIME DISPLAY
In the normal display mode, you can select the following
display modes on the display via the [MODE] button:
- Time with seconds
- Time with weekday
- A second time zone with weekday
- A second time zone with seconds
- Date
- Permanently switching off radio reception
You can switch radio reception on/off and simply use the
device as a regular quartz clock. Press the [ ] button 3
seconds to switch radio reception on/off.
The reception symbol ( ) no longer appears on the
display when radio reception is switched off.
- MANUAL SETTINGS
The device offers various ways to alter basic settings.
Select the normal time display. Then press the [MODE]
button for 3 seconds to get into the settings mode. Now
every time you press the [MODE] button the display
shows a function (blinking) which can be set.
Then press one of the [ ] or [ ] buttons for the respective
function.
You can alter the following functions (simply press the
[MODE] button in between each respective function in this
order):
˚C
w
s
w
w
s
s
- Activating / Deactivating the daily rain alarm
1. Every time the [ALARM] button is pressed in the rain
mode, the display switches between current rain data
and the rain alarm value (“ALARM HI” appears in the
display). When the alarm is deactivated, “OFF” is
shown. When the alarm is activated, the programmed
value is shown.
2. During alarm display, an alarm can be activated or
deactivated with the [ ] or [ ] button.
- Setting the alarm (rain alarm)
1. Press the [ALARM] button to display the rain alarm.
2. Press and hold the [ ALARM ] button about 2 seconds
until “ALARM HI” starts blinking (OFF or a number
appears in the display).
3. Press the [ ] or [ ] button to set the value. Confirm
your selection by pressing the [ ALARM ] button.
- Activating / Deactivating the rain alarm
Every time the [ALARM] button is pressed in the rain
mode, the display toggles between current rain data and
the rain alarm (“ALARM HI”). When the alarm is
deactivated, “OFF” is shown. When the alarm is
activated, the programmed value is shown.
During alarm display, an alarm can be activated or
deactivated with the [ ] or [ ] button
5 . RADIO CLOCK (buttons on back)
- INFORMATION ON TIME SIGNAL
RECEPTION
The device is designed such that the calendar clock is
automatically synchronized as soon as it is within the
DCF 77 radio signal.
To ensure good time-signal reception, do not position the
device near any metallic objects or electrical appliances
to keep interference to a minimum.
The first-time, complete reception of the signal usually
takes about 3-5 minutes, depending on the strength of
time signal reception. The subsequent cyclical time
synchronization only lasts a few seconds.
If reception problems persist, set the clock manually and
wait until later at night. The chances of successful
reception are greater at night (particularly between
midnight and about 4 am). One successful reception per
week is sufficient to ensure the clock runs precisely.
TREND
TREND
TREND
Indicator
Trend
- MINIMUM AND MAXIMUM
TEMPERATURE
The values for the maximum and minimum temperatures
measured are automatically saved. To check over values,
press the [MEMORY] button once to see the minimum
values. Pressing the [MEMORY] button once again
shows the maximum temperature. “MAX“ or “MIN”
appear correspondingly. To delete the saved values, press
the [MEMORY] button 2 seconds: minimum and
maximum values are now deleted. Pressing the
[MEMORY] button once again shows the current
minimum and maximum temperatures until fresh data
arrives.
The [MEMORY] button is on the back of the device.
- TEMPERATURE TENDENCY DISPLAY
The tendency indicator shows the temperature tendency
of the values measured via the corresponding sensor
channel. The indicator can show the three following
trends: rising, constant and falling.
8. TECHNICAL DATA
Receiver unit
Indoor temperature : 0ºC to +50ºC
(32ºF to +122ºF)
Temperature resolution : 0.1˚C
0.2˚F
External transmitter unit
Measurement range : -15ºC to +60ºC
Outdoor temperature (5ºF to +140ºF)
Temperature resolution : 0.1˚C
0.2˚F
Transmission frequency : 433 MHz
Number of channels : 3
Range : maximum 30 meters
(in an area free of interference)
Measurement cycle : ca. 43 - 47 seconds
(blinking)
reception
activated
- previous
reception
was
satisfactory
- previous reception
was not satisfactory
or time was set
manually
no symbol
- radio reception
deactivated
The devices functions in the search
mode (blinking).
Receiver functions on normal
reception.
No signals received for more than 15
minutes.
rising constant falling