CONTENTS
TROUBLESHOOTING
Problem Symptom Likely Cause Solution
No Power
Insufficient Power
Camera will not
turn on
Battery is dead or no
battery is inserted
Insert fresh batteries
The battery indicator
icon on the LCD is
empty
Image appears blurred
or dark
The camera or subject
was moving when the
picture was taken
Batteries are dead
Insert fresh batteries
T
PC Connection
The subject is too
close
The lens is dirty
Hold the camera firmly
Move away from the
subject
Clean the lens with a
soft cloth
Camera will not focus
Subject is not in the
center of the LCD
(preview)
Move the subject to
the center of the LCD
(preview)
Cannot take pictures
when the shutter
button is pressed
Camera is not turned on
No space on the SD
card / internal memory
The camera has timed
out
T
Delete unwanted files
or insert a new SD card
T
PC does not recognize
the camera
Check the USB cable
connection
Interference from other
USB devices
Make sure both ends
of the USB cable are
connected
Disconnect other USB
devices
Camera Malfunctions
During Use
Electrostatic discharge
(static electricity)
interfered with the
camera
Check that the
camera is connected
to the PC
T
then turn it back on. If
connected to the PC
disconnect the camera
from the USB cord, and
turn it off then on again.
Removable disk
crashes with the
network drive
The camera is detected
by Windows and works
properly
letter of the removable
disk is not created
Disconnect and
reconnect the camera.
No response from any
of the function keys
The LCD on camera
freezes when an SD
card is inserted into
the camera.
SD card is being used
for the first time and is
not formatted
Ensure you only use a
new or Formatted SD
card
SAFE BA
• Use alkaline batteries for best performance and longer life.
• Use only the type battery recommended for the unit.
• Batteries should be replaced only by an adult.
• Insert batteries with the correct polarity ( + and – ).
• Do not mix old and new batteries.
• Do not mix alkaline, standard (carbon-zinc), or rechargeable (nickel-cadmium) batteries.
• Do not short-circuit batteries.
• When not used for an extended time, remove batteries to prevent possible leakage and damage
to the unit.
• Do not mix rechargeable and non-rechargeable batteries.
• Rechargeable batteries are to be removed from the toy before charging.
• Rechargeable batteries are to be recharged only under adult supervision.
• Do not recharge non-rechargeable batteries.
• Exhausted batteries are to be removed from the toy
• Do not dispose of batteries in fire as they may leak or explode.
NOTE: The voltage of a fully-charged, rechargeable battery is often lower than that of a fresh
alkaline battery
rechargeable batteries for best performance and for longest play time.
FCC COMPLIANCE
MINIMUM (RECOMMENDED) SYSTEM REQUIREMENTS
NOTE: This equipment has been tested and found to comply with the limits for Class B digital
device, pursuant to Part 15 of FCC Rules. These limits are designed to provide reasonable
protection against harmful interference in a residential installation. This equipment generates,
uses and can radiate radio frequency energy and, if not installed and used in accordance with the
instructions, may cause harmful interference to radio communications. However
guarantee that interference will not occur in a particular installation. If this equipment does cause
harmful interference to radio or television reception, which can be determined by turning the
equipment off and on, the user is encouraged to try to correct the interference by one or more of
the following measures:
• Reorient or relocate the receiving antenna.
• Increase the separation between the equipment and receiver
• Connect the equipment into an outlet on a circuit different from that to which the receiver is
connected.
• Consult the dealer or an experienced radio/TV technician for help.
This device complies with Part 15 of the FCC Rules. Operation is subject to the following two
conditions: (1) This device may not cause harmful interference, and (2) this device must accept
any interference received, including interference that may cause undesired operation.
W
compliance could void the user
Note: Shielded cables must be used with unit to ensure compliance with the Class B FCC limits.
Please keep this manual as it contains important information.
‘Let’s care for the environment!’
The wheelie bin symbol indicates that the product must not be disposed of with other household
waste. Please use designated collection points or recycling facilities when disposing of the item.
Do not treat old batteries as household waste. T
TM & © The Little T
an MGA
LITTLE TIKES™ and all related logos, names,
characters, distinctive likenesses and slogans,
as well as the packaging and images appearing
thereon, are the exclusive property of
The Little T
Little T
2180 Barlow Road
Hudson, Ohio 44236 USA
(800) 321-0183
Printed in China
0908-1-E
www.littletikes.com
CPU 800MHz or higher utilizing Windows® 2000, XP or Vista operating systems. A USB port, 16
bit color display at 800 x 600 resolution, 256 MB RAM, 200 MB free disk space, Direct X 8.1 or
above.
Windows® is a registered trademark of Microsoft Corporation.
STILL PICTURE MODE
Y
• Press the Power button until the Camera icon lights up on the Mode Indicator
• Look through the viewfinder to set up your shot and center the subject inside the four “auto
focus” marks.
• Hold the camera still, press the Record button, and continue to hold the camera still for several
seconds until the camera has focused on the subject and taken the picture..
• The photo will stay on the screen for 3 seconds and then return to the live image ready for
another photo.
TIP: Zoom the camera in and out by pressing the Zoom buttons! The Zoom Indicator on the right
side of the screen will tell you how far you are zoomed in or out!
ADDING IMAGES TO
• With the Camera in Still Picture Mode press the Edit button.
• Use the Left or Right buttons to see the available images. (Fig. 8)
• Stop at the image you like and press Record to add it to your photo.
• Choose your shot then press Record to take the photo.
NOTE: A
can have either sound or an image but not both.
Fig. 8
R
L
QUICK ST
PLA
T
• Press the Power button until the Mode Indicator shows the Playback symbol.
• Press the Left or Right Buttons to look through all of your photos and videos
in the order that they were taken.
NOTE: Photos will have a “DC” followed by a number and videos will have a
“DV” followed by a number as well, and it will be seen above the red Play icon
(Fig. 9).
TIP: Y
the red Playback icon is on the screen.
Fig. 9
DV 00001
00:01
MENU MODE
T
• Press and hold down the Left or Right Button for about 3 seconds.
• Scroll through the following screens by pressing the Record button.
TO DELETE
• Select the photo or video in playback mode then press the T
• The screen will ask you if you want to delete the item (Fig. 10).
• Use the Left or Right Buttons to select Y
confirm.
Remember
ADD SOUND OR IMAGE
• In Playback Mode choose the picture or video to which you wish to add
sound or image.
• Press the Edit Button then use the Left or Right Buttons to select a sound or
image and press Record to confirm. (Fig. 1
• The Camera will then make a copy of the photo or video that has your fun
image or sound, a new number will automatically be assigned to it, and it will
appear as the last item on your Playback Mode list.
Fig. 10
Fig. 1
Video Quality – Shows the video
resolution as well as the number of
videos you have saved on your camera.
Photo Quality- Lets you pick the photo
resolution. Press the Left or Right Buttons to
highlight the option then press Record.
NOTE: This screen also shows the number of
photos you have saved on your camera.
Storage – Press the Left or Right buttons
to choose the camera’s internal memory
or an SD Card (not included).
Language – Press the Left or Right
Buttons to choose to display text in
English, Spanish, French, or German.
TM & © LITTLE TIKES
AN MGA COMPANY
Video Quality
320 x 240
Videos 9
TM & © LITTLE TIKES
AN MGA COMPANY
Picture Quality
1280 x 960 640 x 480
Pictures 9
HIGH LOW
TM & © LITTLE TIKES
AN MGA COMPANY
Storage
32 MB Free 0 MB Free
TM & © LITTLE TIKES
AN MGA COMPANY
Language
Español
Francias
English
German
NO
YES
DC 00002
DV 00001
00:01
Press Record again to return to real time viewing to take a picture of video.
5. Double click on the DCIM folder
this folder
6. Drag and drop the photographs or videos from this folder onto your desktop or to another folder
on your PC.
NOTE: If you have been saving your photos and videos onto an SD card, you can also copy them
to your PC by using a memory card reader (not included). For more information on how to save to
an SD Card, see the Menu Mode section of this manual.
NOTE: If you click on the Removable Disk icon but you have not inserted an SD card, your PC will
display “Please insert a disk into drive”.
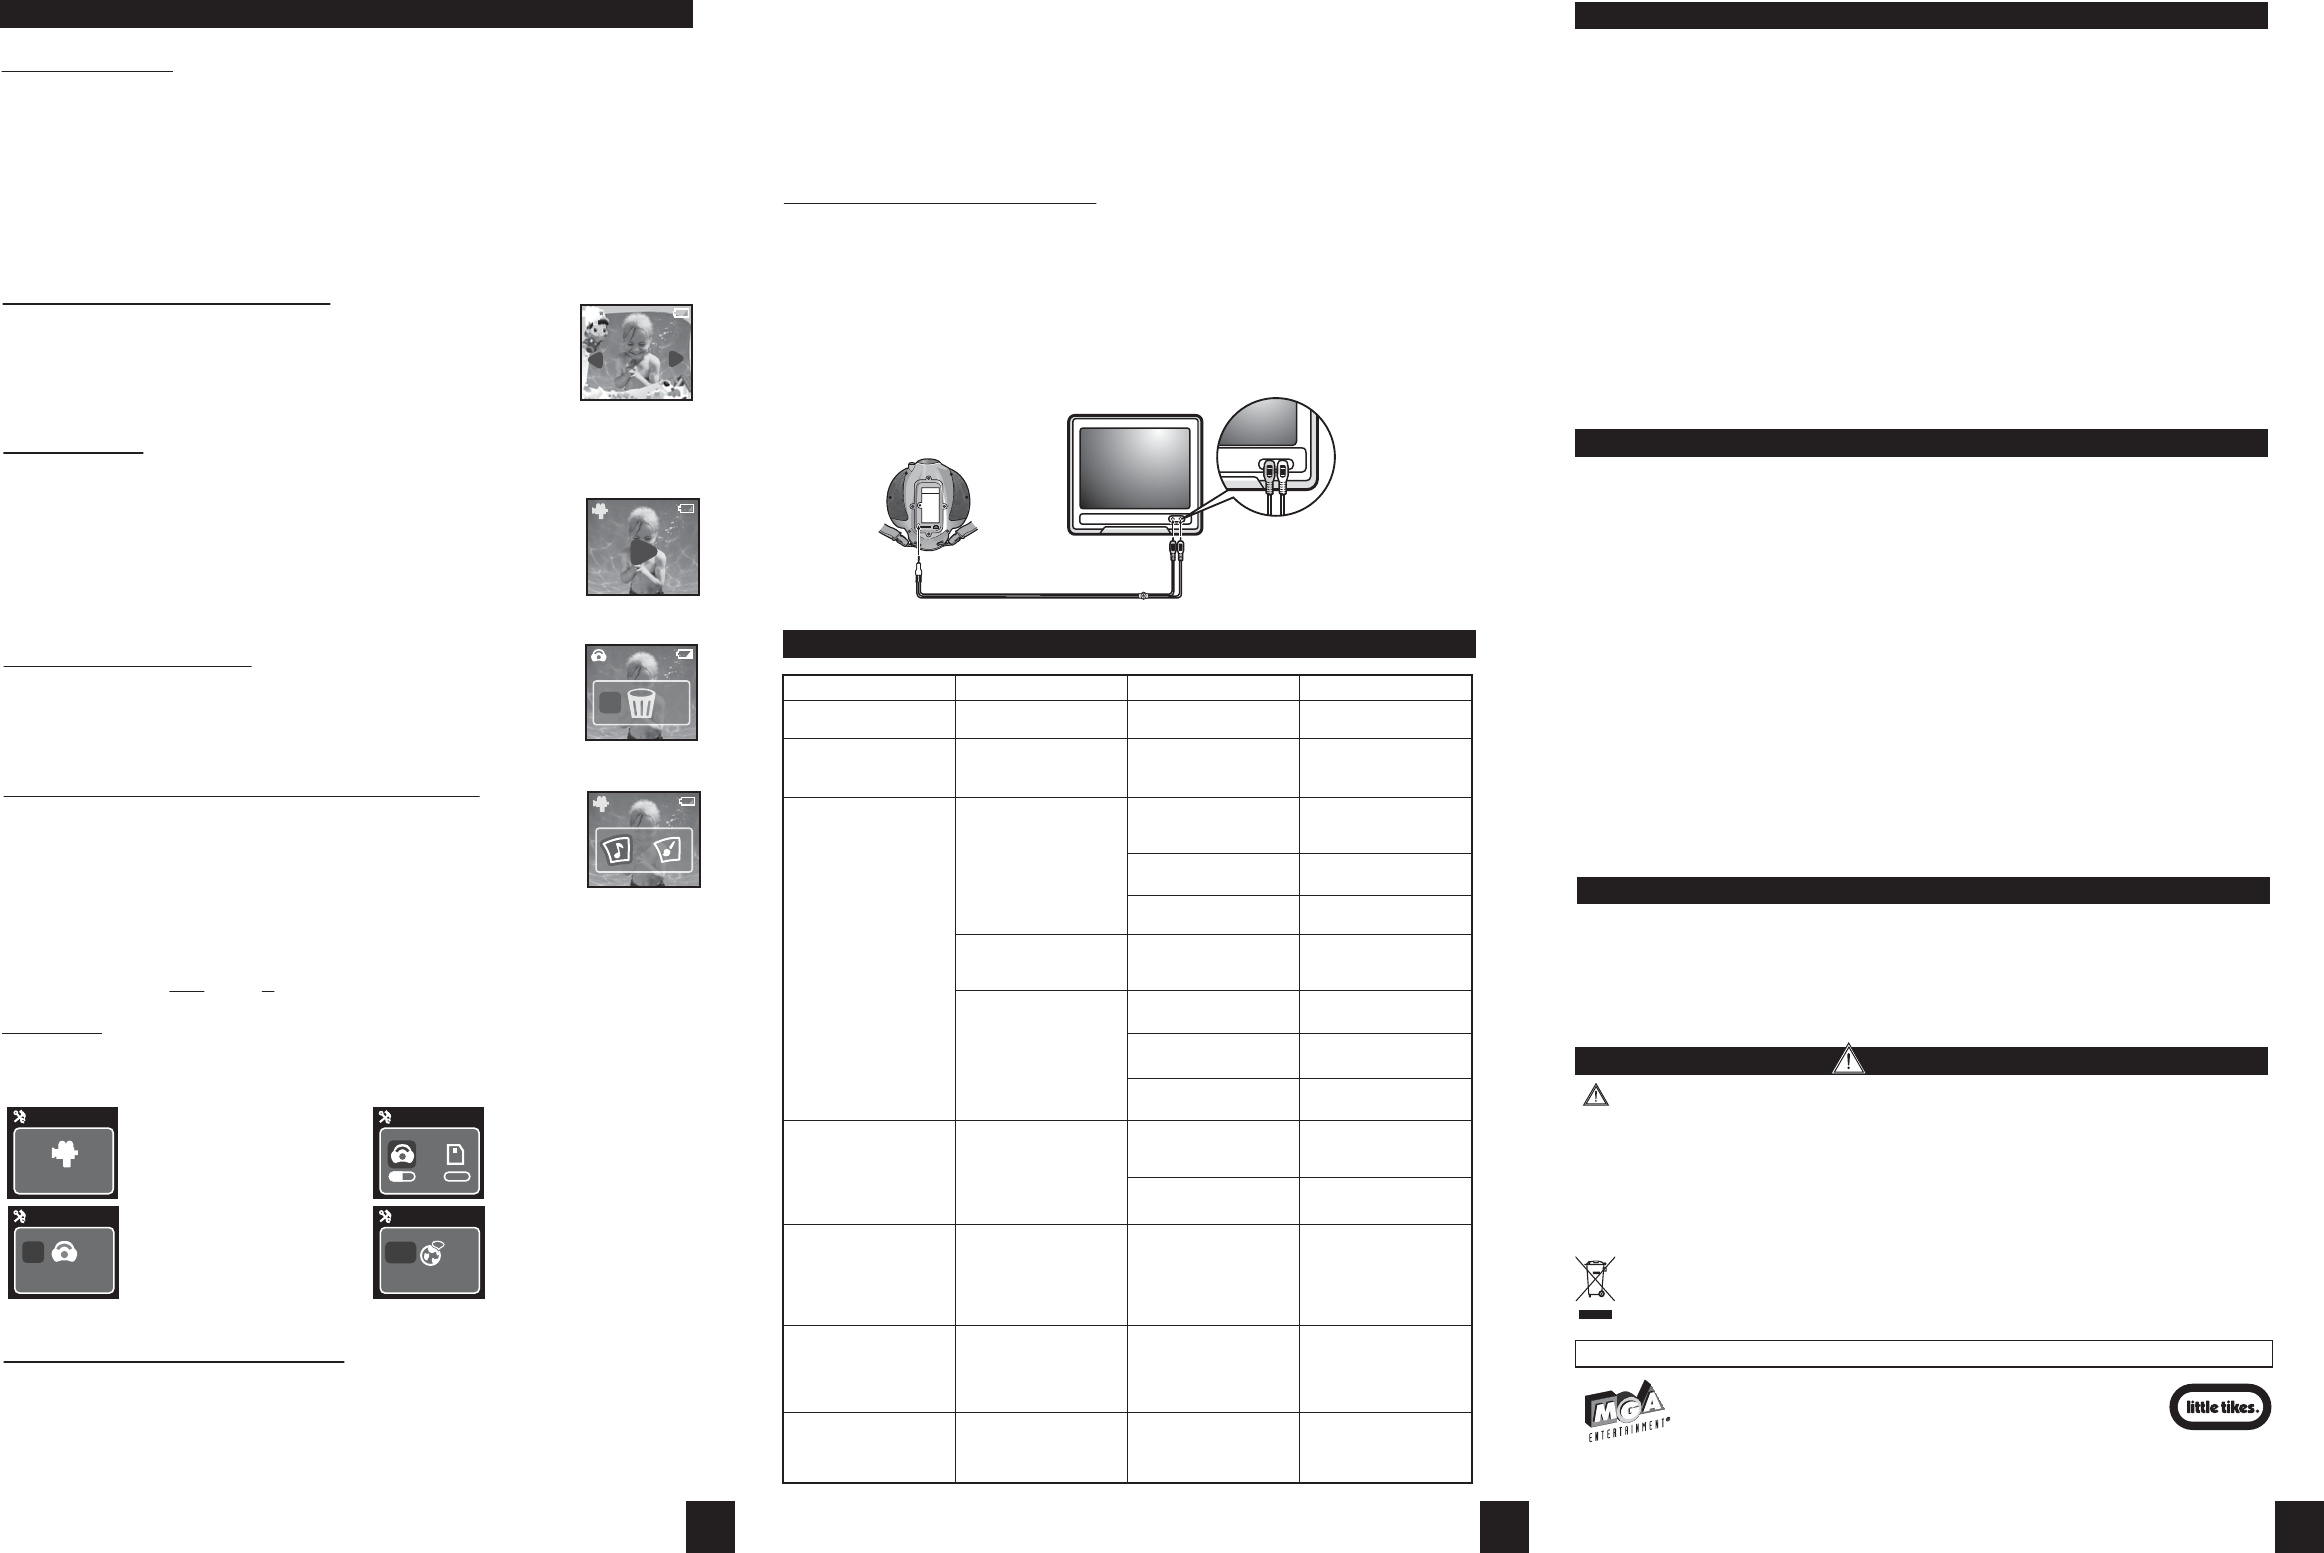
VIEWING PHOTOS
T
1.
2.
into the corresponding audio and video ports on your television. (Fig.12)
3.
4.
5.
6.
NOTE: B
Fig.12
TV Out Cable
COPYING PHOTOS
T
steps:
1. Press and hold the Power Button on the Camera for 2 seconds to turn it OFF
2. T
3. Connect the Camera to your PC using the included USB cable.
4. T
memory drive, the other is the SD card memory drive.
NOTE: Y
when the picture is viewed through the camera or on a TV screen.
ALSO NOTE: Y
4 5 6
W
WARNING: ALL UNDERWATER GAMES ARE DANGEROUS - USE ONLY UNDER
SUPERVISION OF AN EXPERIENCED SWIMMER.