22353000. Replacing the dust lid retainer parts & black handle A-0.6.5
22353300. Replacing the accessory lid 19
22353400. Replacing the cable terminal and screw
22353600. Replacing the dust cover with indicator
22353700. Replacing the dust cover without indicator
22354500. Replacing the front filter frame
ASSEMBLY INSTRUCTIONS GM 200 / 300 / 400 & KING 500 SERIES
Instruction No. 82362400/00-08
To be performed by a skilled
or instructed person only !
Disconnect the vacuum cleaner
from the power supply before
starting the work!
Replacement of the dust cover,
22353600, 22353700:
With indicator- Open the dust cov-
er until it stops and continue with a
little pressure by hand until it slides
free of the hinges.
Without indicator- Open the dust
cover until it slides free of the
hinges.
Replace in reverse order.
Replacement of the front filter
frame, 22354500:
Open the dust cover and remove
the dust bag and front filter.
Remove the frame by lifting it away
from the four brackets. When
replacing it must snap back in four
places.
Replace in reverse order.
Replacement of the cable
terminal and screw, 22353400:
Pull out the plug and unscrew the
screw with a Pozi drive screwdriver
no.2 and remove the cable terminal
by guiding the cord through the
slot in it.
Replace in reverse order.
Replacement of the accessory
lid, 22353300:
Open the accessories lid to vertical
position and pull it away.
Release the hinge tube snap with a
screwdriver and slide out the part.
Replace the new hinge tube by
sliding it back until it clicks into
position.
Replace in reverse order.
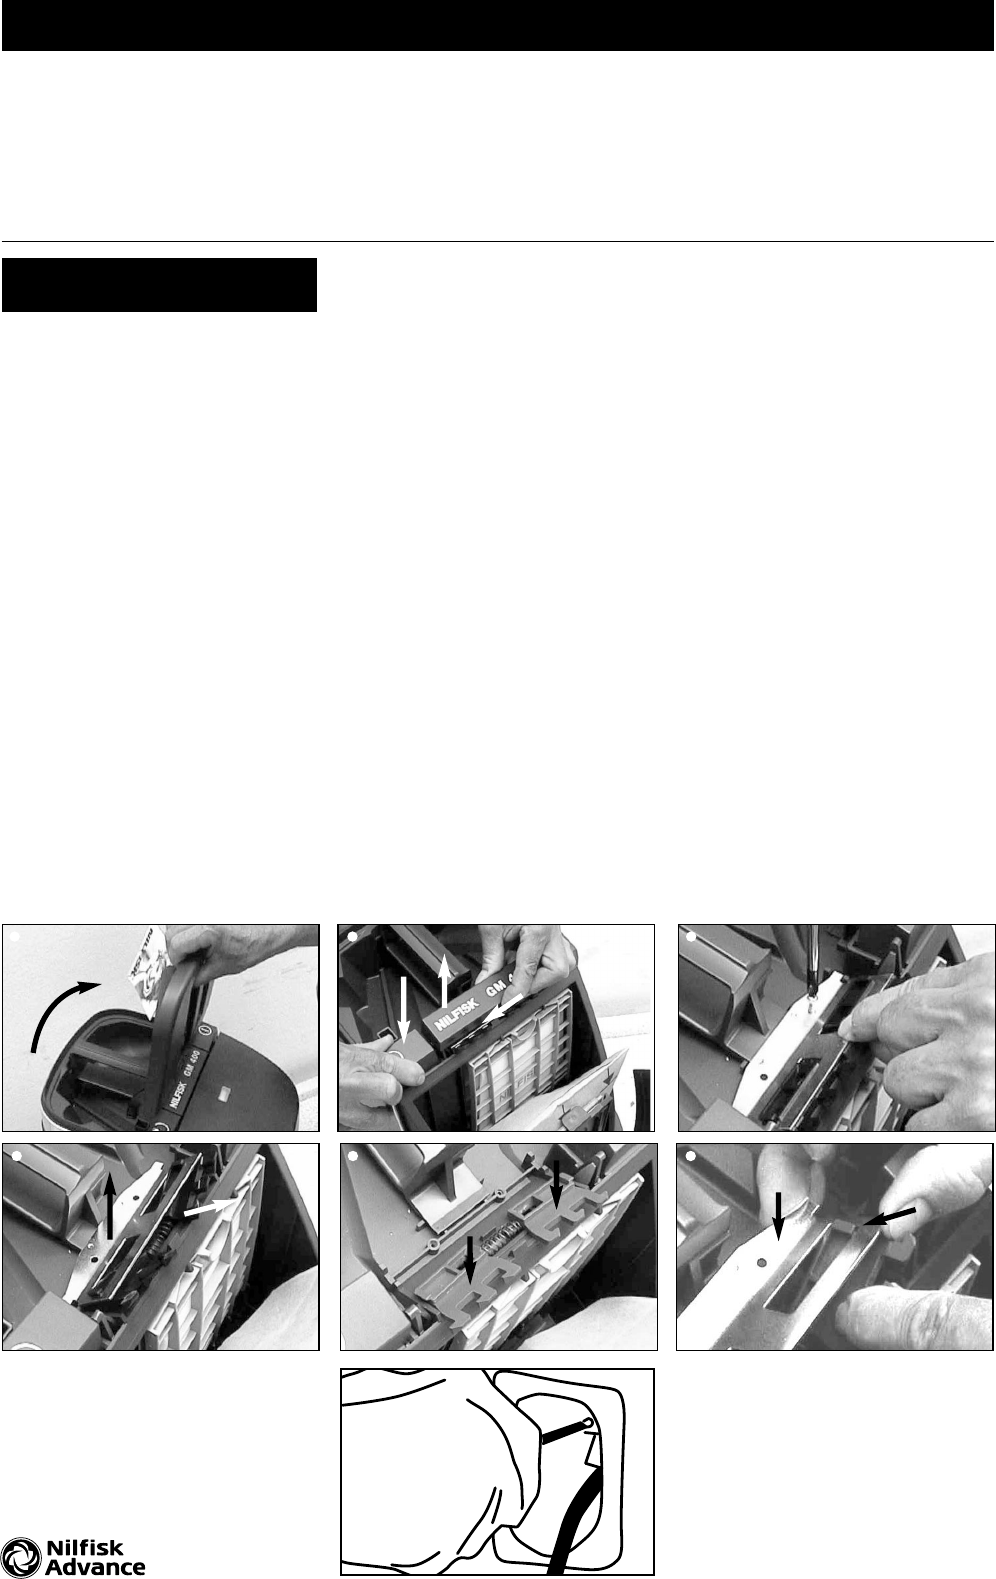
Replacement of the dust lid
retainer parts & black handle,
22353000:
Q Open the accessory lid until it
stops and continue with a little
pressure by hand until it slides free
of the hinges and remove it. Open
the dust cover.
W Push down the cable release
button (a) and press by hand the
dust cover button sideways (b) and
up (c) to release it.
E Unscrew the two screws with a
screwdriver type Pozidrive no.2
and remove with the steel plate.
Now the black handle can be
replaced.
RT Remove the two ratchets
from the spring and replace the
two dark grey versions into the
spring.
Remove and replace the black
handle
Y When replacing the steel plate
be sure that the hooks on the
ratchets in both sides are in mesh
with hole in the steel plate.
Press down the steel plate and
replace the two screws with ade-
quate force.
To replace the dust cover button,
push down the cable release but-
ton and press it by hand sideways
to fit the two tabs.
Replace the accessory lid and lock
the dust cover.
a
1
2
b
c
YT
Q EW
R
U