PREPARING THE FRIDGE/FREEZER
5
Allow an adequate space and install the fridge/freezer on a firm, level floor.
• If the appliance is not level, there may be unusual noises and poor cooling.
• Wait for at least one hour before plugging the appliance in.
Clean the fridge/freezer.
• Wipe and clean the appliance inside and outside with a damp cloth.
Plug the fridge/freezer into a wall socket used exclusively by this appliance.
• This appliance must be properly grounded.
Use of an grounded socket exclusively for the
appliance:
• If you are using a socket with an earthing terminal, you
do not require a separate earthing connection.
Use of a non-grounded socket:
• Connect the “earthing wire” to the copper plate and bury
it at a depth of at least 25 cm in the ground.
If the front of the appliance is slightly higher than the rear, the door can be open and closed more easily.
Place the food in the fridge/freezer.
• It is recommended that you wait for the appliance to cool for 2-3 hours before storing food in it.
INSTALLING THE FRIDGE/FREEZER
4
Warning
LEVELLING
The appliance tilts down to the left.
Turn the left adjusting leg in the direction of the arrow with
a flat head screwdriver until the appliance is level.
The appliance tilts down to the right.
Turn the right adjusting leg in the direction of the arrow
with a flat head screwdriver until the appliance is level.
Install all shelves and compartments removed during transport in the correct positions.
Clean the fridge/freezer and accessories to remove any dust that accumulated during packing and
shipping.
The interior light of the appliance will light up when the door is open.
Set the temperature control to the coldest temperature and let the refrigerator operate for one hour.
The freezer should get slightly chilled and the motor should run smoothly with a soft hum and no
noise.
Your fridge/freezer is operated by a compressor which switches “on and off” to maintain the internal
temperature. When the compressor is new, it requires running in for a period of up to five months.
During this period, it may be slightly noisy. This is quite normal and does not represent a fault.
Store food once the temperature in the refrigerator is sufficiently low. It takes a few hours after
starting the refrigerator to reach the proper temperature.
If the appliance does not operate correctly, check the electricity supply. If the problem persists,
contact your dealer.
To prepare your appliance for use and check that it is running correctly, take the following steps.
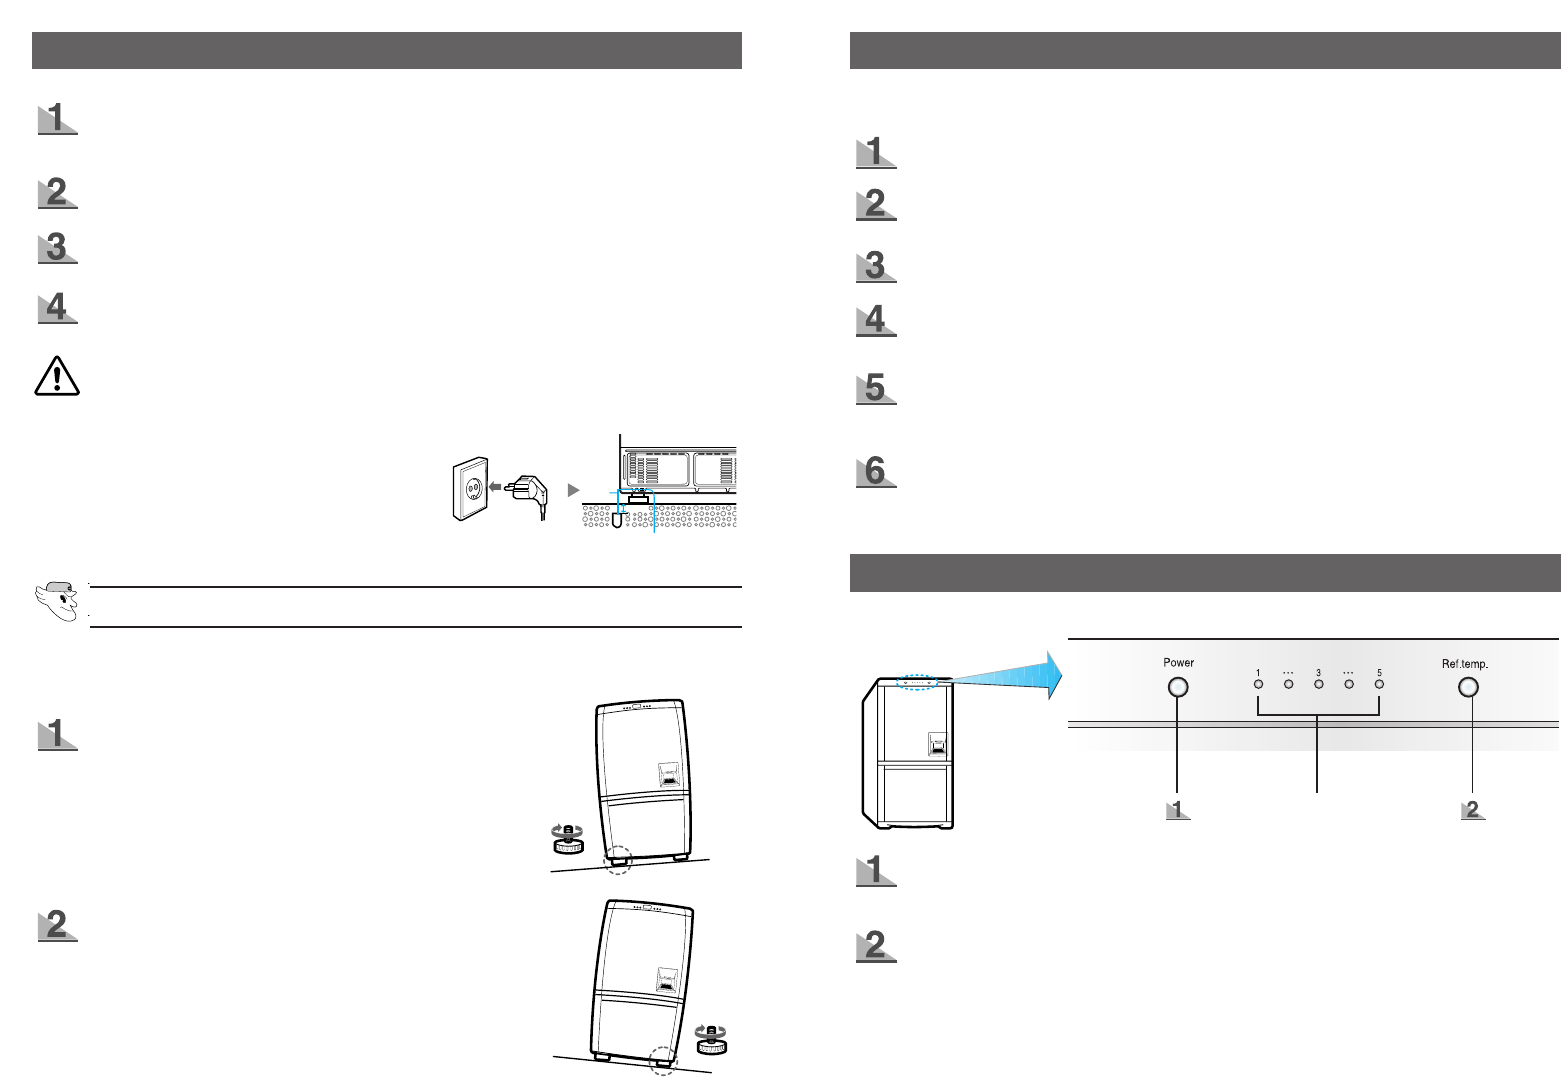
USING THE CONTROL FEATURES
A. Basic Model
POWER Button
• Main power on/off switch.
• Switches the appliance on and off.
REF.TEMP button
• Press the REF.TEMP button to control the refrigerator temperature.
• Initially, the mid-point temperature setting is selected.
• There are five temperature settings, represented by five indicator lights (
➀
).
When all lights are on, the temperature is at its coolest.
• Press the REF.TEMP button one or more times until the required temperature is set.
• The freezer temperature will be adjusted automatically according to the refrigerator temperature.
➀