Unscrew the cover with head screwdriver.
1514
REPLACING THE INTERIOR LIGHT
Always unplug the appliance when replacing the refrigerator light. Otherwise, there is the danger of
electric shock.
+
• Check that the power plug is correctly connected.
• Is the temperature control on the front panel correctly set?
• Does sun shine on the appliance or are there heat sources nearby?
• Is the back of the appliance too near to the wall?
The appliance is not operating at all or the temperature is too high
• Is the temperature control on the front panel set to the coldest temperature?
• Is the surrounding temperature too low?
• Did you put food with a high water content in the refrigerator?
The food in the refrigerator is frozen
• Check that the appliance is installed on a stable, level floor.
• Is the back of the appliance too near to the wall?
• Have any foreign objects fallen behind or under the appliance?
• Is the noise coming from the compressor in the appliance?
• A ticking sound may be heard inside the appliance; this is normal. This sound occurs when the various
accessories contract or expand.
There are unusual noises
• Heat-proof pipes are installed in the front corners of the appliance to prevent condensation from forming.
When the surrounding temperature rises, this may not always be effective. However, this is not abnormal.
• In very humid weather, condensation may form on the outer surface of the appliance when the moisture
in the air comes into contact with the cool surface of the appliance.
The front corners and sides of the appliance are warm and condensation starts to form
PROBLEMS AND SOLUTIONS
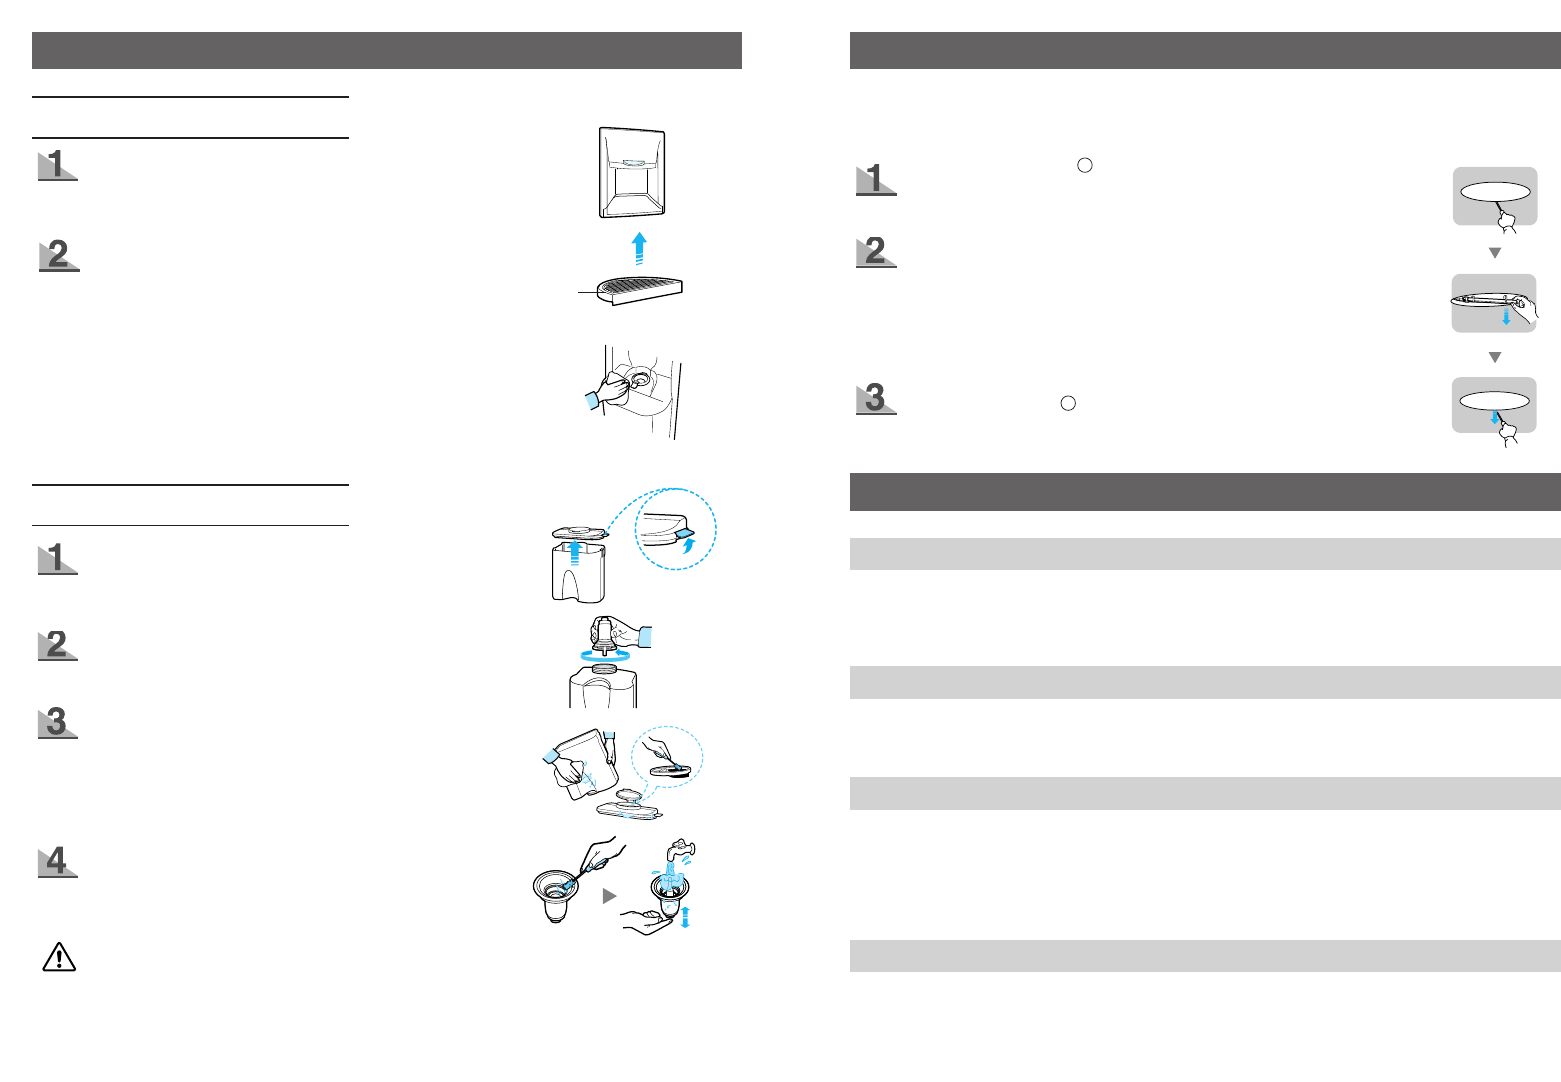
- Fluorescent light
• Remove the interior light by pulling it downward, then replace it with
a new one.
- Incandescent light
• Turn the interior light to pull it out and replace it with a new one.
Screw the cover with head screwdriver.
CLEANING THE WATER DISPENSER
Connection path
Wipe out the connection path and surrounding area with a clean
damp cloth.
Dispenser Tray
Using the dispenser tray handle, remove the tray.
Empty the water in the dispenser tray, then clean it using
warm water and detergent.
Dispenser tray
Water Tank / Supply Device
Pull upward and disassemble the hooks on both
sides of the large-sized cap.
Loosen the water supply device by turning it in the
direction of the arrow and removing it.
Wipe the large-sized cap and the exclusive water tank
with warm water and detergent.
• Hold the cap and pull it upwards to remove it. Clean the
cap and filtering bottle attached to the cap with a soft
brush.
After cleaning the water supply device with a soft
brush, press the water supply device operation lever,
then wash it in running water.
• Clean the water tank frequently if it used to dispense tea or other such beverages. Only use
filtered tea. For better hygiene, beverages with a high sugar content (juice, soft drinks) are not
recommended.
• Deposits can be cleaned by wiping the tank with a cloth dampened in vinegar or salt water.
• Check that the rubber seal on the water supply device has not slipped off or is not damaged
by a sharp-edged object. Otherwise, it may leak.
Caution
+