u with Sun 2 and 3 , Twilight , Temperature ,
W
ind and Rain
Proceed as described under “Sun 1 ”.
Note
• LUXOR 400, 402, 404, 405: Only the Twilight function can be assigned
to these devices.
• LUXOR 408, 409: With these devices, only one Sun function can be assigned
per channel.
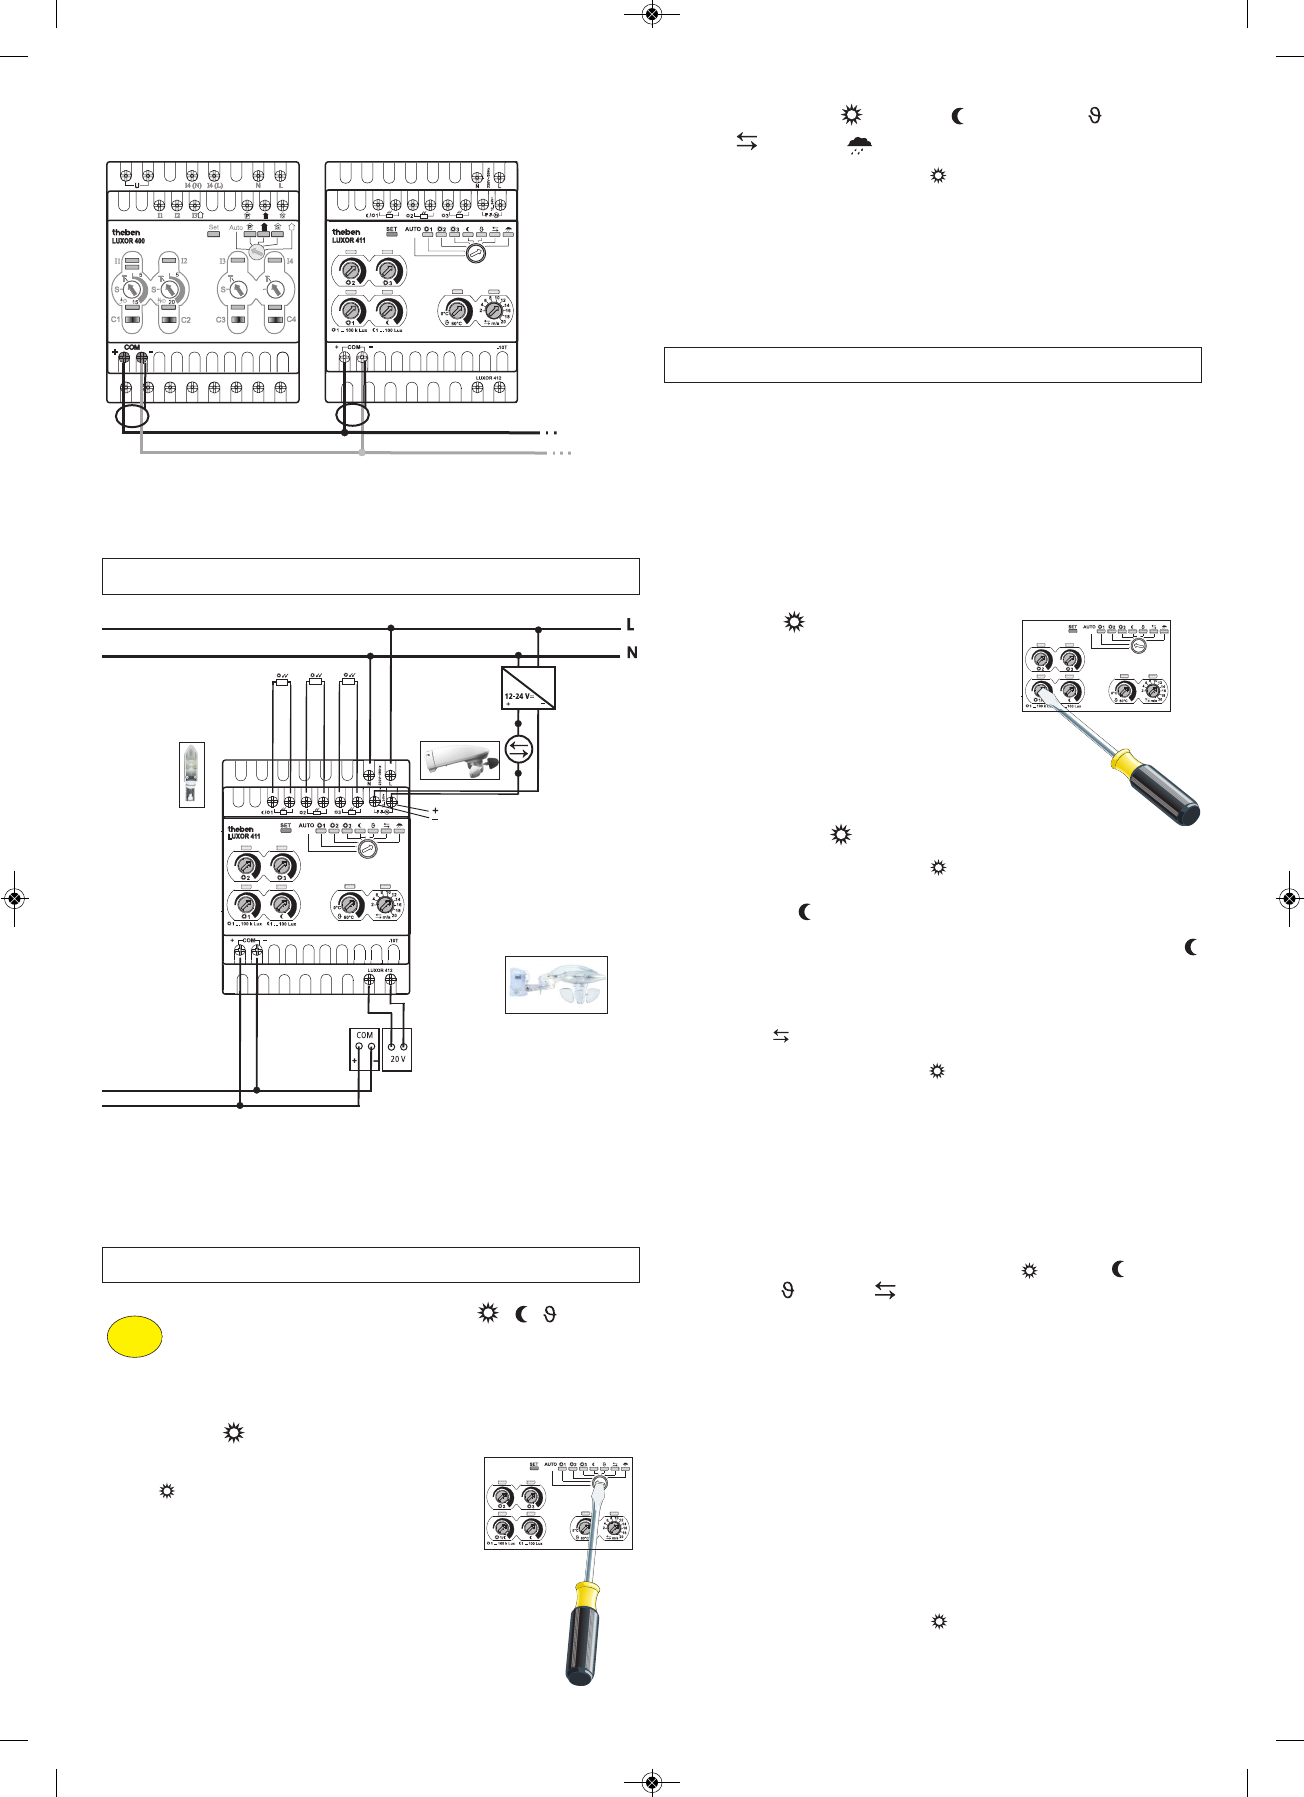
Power unit
12-24 V DC
SELV
Wind sensor
LUXOR 413
Connection terminals
of weather sensor
system
Weather sensor
system LUXOR 440
Light sensor
(Sep. light sensor
907 0 008)
SELV
SELV
FELV
Connecting further
LUXOR devices
9.0 Connection and installation
10.0 Assigning/“teaching-in” channels
First, assign the sensor module functions , , , etc. to
the individual LUXOR devices (e.g. to the dimming module, shut-
ter module, etc.), before defining the threshold values.
u with Sun 1 (using shutter module LUXOR 408 as an example)
Use a screwdriver to set the “Learn” selector switch
to 1.
The Sun 1 LED, the SET LED and the LEDs for the
assigned channels on the shutter module light up.
If you wish to select/deselect a channel, press the
respective channel key C1 - C4 on the shutter
module. If the channel is selected, the LED will
light; if it is not selected, the LED will not light.
To end the assignment session, turn the “Learn”
selector switch to Auto, which will cause the
SET LED to go out.
Hint:
Ensure correct polarity!
Make the 2-wire connection between the COM interfaces.
Connecting further
LUXOR devices
11.0 Setting the threshold values
– Without weather sensor system: light sensor 1 triggers Sun 1 and
Twilight.
– With weather sensor system: light sensor 1 is ignored. The bright-
ness value comes from the weather sensor system.
u in conjunction with light sensors and wind sensor
LUXOR 413
S
un 1 function
C
onnect light sensor 1. This supplies
infomation to the sensor module.
Use a screwdriver to set the threshold value
at the Sun 1 selector switch. The LEDlights up
when the threshold value is exceeded, and
goes out when the value falls below the
threshold value.
Sun 2 and 3 functions
Proceed as described under “Sun 1 ”.
Twilight function
Use a screwdriver to set the threshold value at the Twilight selector switch .
The LED goes out when the threshold value is exceeded,
and lights up when the value falls below the threshold value.
Wind function
Proceed as described under “Sun 1 ”.
The LED lights up when the threshold value is exceeded, and goes out when
the value falls below the threshold value.
The threshold value can be adjusted in steps of 2 m/s, from 2-20 m/s.
u in conjunction with the weather sensor system
LUXOR 440
– The selector switches in the bottom row (Sun 1 , Twilight ,
Temperature and Wind ) are assigned to the weather sensor
system.
Connect the weather sensor system. The measurements are sent, via the
COM interface, to the sensor module.
To set the threshold values for Sun 1, Twilight, Temperature and Wind,
proceed as described under Sun 1/Twilight.
Temperature function: The LED lights up when the threshold value is
exceeded, and goes out when the value falls below the threshold value.
u in conjunction with light sensors and the weather
sensor system LUXOR 440
Proceed as described under “Sun 1 ”.
Bear in mind that light sensor 1 is ignored.
For the Sun 1 and Twilight functions, the brightness value from the
weather sensor system is used.
"Note: Connect the SELV voltage supply and the FELV communications connec-
tion to the LUXOR 440 weather sensor system via two separate cables."