E-32
3. In any mode (except a setting mode), press
C
to take a digital
compass reading.
• This will causeCOMP.
4. While direction angle readings are in progress, press
E
to record the
currently displayed direction in Bearing Memory.
• The d
Bea
• T
Bearing Memor
C
.
• Se
5. Now you can advance while monitoring the Bearing Memory Pointer to
ensure that it remains in the 12 o’clock position.
• Pressing
E
whil
Bea
data yo
Note
• Wh
you to ad
objective.
12 o’clock
position
Bearing Memory Pointer
North
pointer
Direction angle of
current reading
Bearing memory
direction angle value
12 o’clock
position
Bearing Memory Pointer
North
pointer
Direction angle of
current reading
Bearing memory
direction angle value
E-33
Digital Compass Precautions
This watch features a built-in magnetic bearing sensor that detects terrestrial magnetism. This means that
north indicated by this watch is magnetic north, which is somewhat different from true polar north. The
magnetic north pole is located in northern Canada, while the magnetic south pole is in southern Australia.
Note that the difference between magnetic north and true north as measured with all magnetic compasses
tends to be greater as one gets closer to either of the magnetic poles. You should also remember that
some maps indicate true north (instead of magnetic north), and so you should make allowances when
using such maps with this watch.
Location
• Taking a direction reading when you are near a source of strong magnetism can cause large errors in
readings. Because of this, you should avoid taking direction readings while in the vicinity of the
following types of objects: permanent magnets (magnetic necklaces, etc.), concentrations of metal
(metal doors, lockers, etc.), high tension wires, aerial wires, household appliances (TVs, personal
computers, washing machines, freezers, etc.).
• Accurate direction readings are impossible while in a train, boat, air plane, etc.
• Accurate readings are also impossible indoors, especially inside ferroconcrete structures. This is
because the metal framework of such structures picks up magnetism from appliances, etc.
Storage
• The precision of the bearing sensor may deteriorate if the watch becomes magnetized. Because of
this, you should store the watch away from magnets or any other sources of strong magnetism,
including: permanent magnets (magnetic necklaces, etc.) and household appliances (TVs, personal
computers, washing machines, freezers, etc.).
• Whenever you suspect that the watch may have become magnetized, perform the procedure under “To
perform bidirectional calibration” (page E-23).
E-34
Taking Temperature Readings
This watch uses a temperature sensor to measure temperature.
To enter and exit the Thermometer Mode
1. While in the Timekeeping Mode, press
E
to enter the Thermometer
Mode.
• TEMP will appe
mea
readi
• The watc
sec
2. Press
E
to return to the Timekeeping Mode.
• The watc
do no
entering the
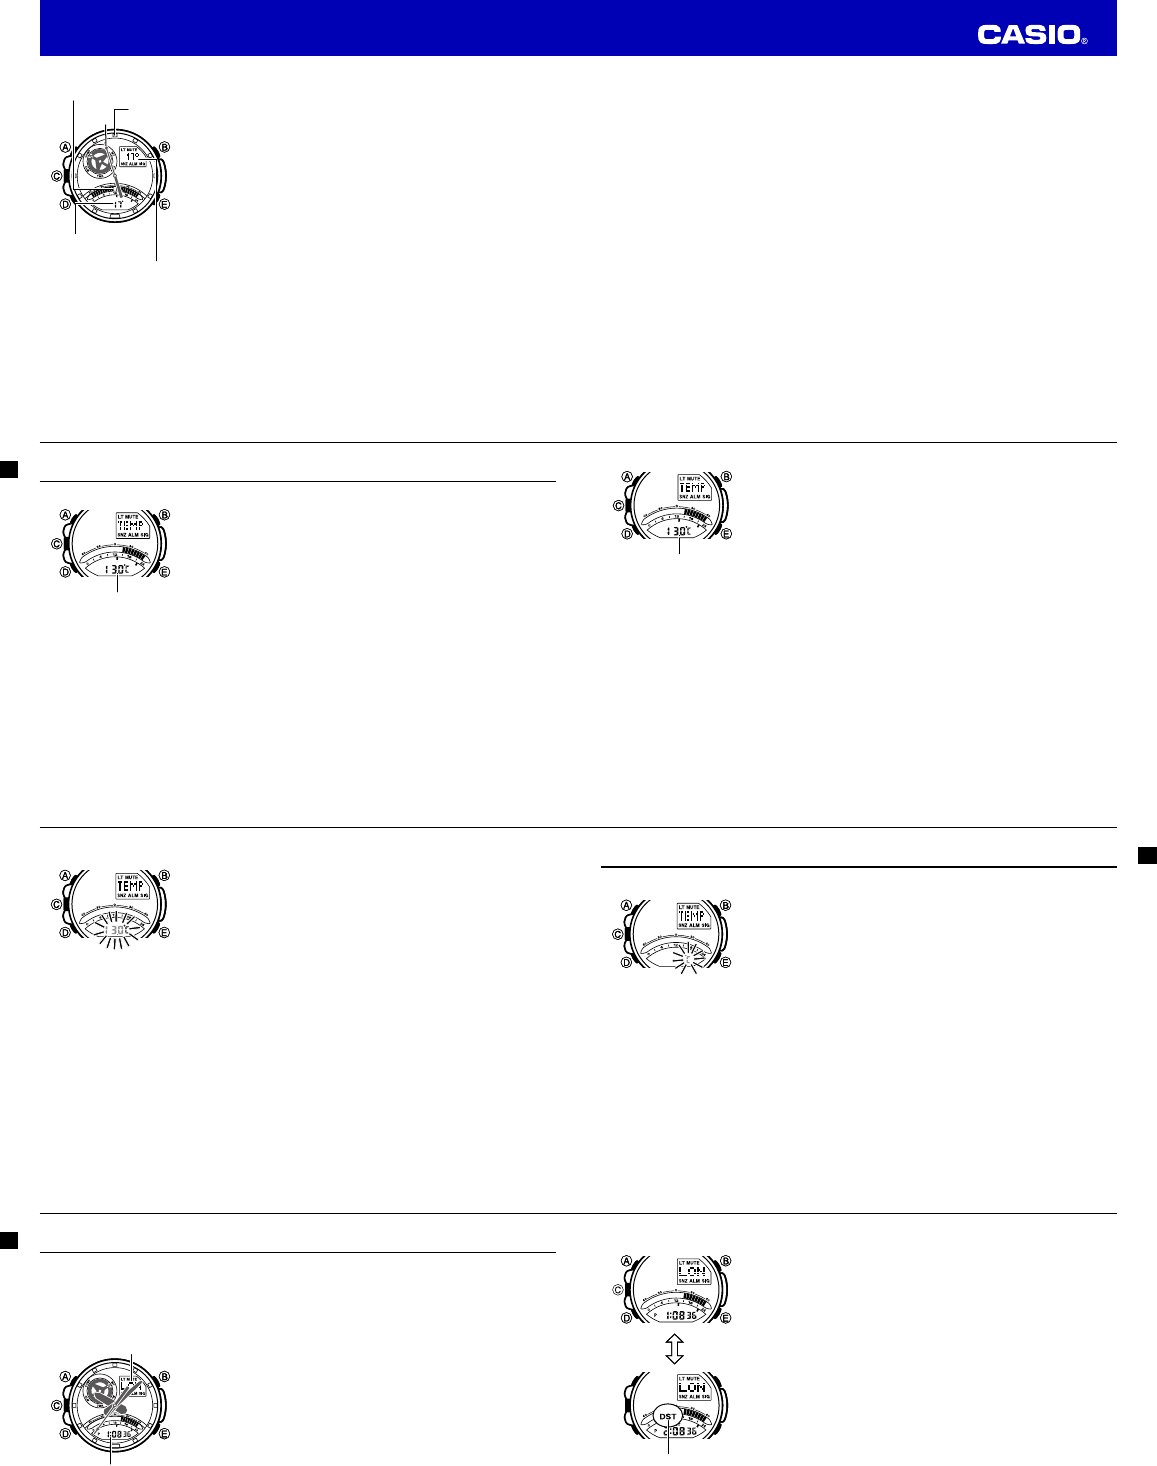
To take temperature readings
While in the Timekeeping Mode, press
E
.
• This starts temperature measurement automatically.
Temperature
E-35
Temperature
• Temperature is displayed in units of 0.1°C (or 0.2°F).
• The displayed temperature value changes to
- - -
°C (or °F) if a
measured temperature falls outside the range of –10.0°C to 60.0°C
(14.0°F to 140.0°F). The temperature value will reappear as soon as
the measured temperature is within the allowable range.
Display Units
You can select either Celsius (°C) or Fahrenheit (°F) for the displayed temperature value. See “To specify
the temperature unit” (page E-37).
Temperature Sensor Calibration
The temperature sensor built into the watch is calibrated at the factory and normally require no further
adjustment. If you notice serious errors in the temperature readings produced by the watch, you can
calibrate the sensor to correct the errors.
Important!
• Incorrectly calibrating the temperature sensor can result in incorrect readings.
Carefully read the following before doing anything.
–
Compare the readings produced by the watch with those of another reliable and accurate thermometer.
– If adjustment is required, remove the watch from your wrist and wait for 20 or 30 minutes to give the
temperature of the watch time to stabilize.
Temperature
E-36
To calibrate the temperature sensor
1. Take a reading with another measurement device to determine the
exact current temperature.
2. With the watch in the Timekeeping Mode, press
E
to enter the
Thermometer Mode.
3. Hold down
A
for about two seconds until the temperature reading
disappears from the bottom display. Release
A
at this time, which will
cause the temperature reading to fl
mode.
4. Use
E
(+) and
B
(−) to calibrate the temperature value with the reading of another instrument.
• Eac
• T
E
and
B
at the
same time.
5.Press
A
to return to the Thermometer Mode.
Thermometer Precautions
Temperature measurements are affected by your body temperature (while you are wearing the watch),
direct sunlight, and moisture. To achieve a more accurate temperature measurement, remove the watch
from your wrist, place it in a well ventilated location out of direct sunlight, and wipe all moisture from the
case. It takes approximately 20 to 30 minutes for the case of the watch to reach the actual surrounding
temperature.
E-37
Specifying Temperature Unit
Use the procedure below to specify the temperature unit to be used in the Thermometer Mode.
Important!
When
TOKYO
is selected as the Home City, the temperature unit is set
automatically to Celsius (
°C
). This setting cannot be changed.
To specify the temperature unit
1. In the Timekeeping Mode, press
E
to enter the Thermometer Mode.
2. Hold down
A
for about two seconds until the temperature reading
disappears from the bottom display. Release
A
at this time, which will
cause the temperature reading to fl
mode.
3. Press
D
to display the current temperature unit in the lower display.
4. Press
E
to toggle the temperature unit between
°C
(Celsius) and
°F
(Fahrenheit).
5. After the setting is the way you want, press
A
to exit the setting
screen.
E-38
Checking the Current Time in a Different Time Zone
You can use the World Time Mode to view the current time in one of 31 time zones (48 cities) around the
globe. The city that is currently selected in the World Time Mode is called the “World Time City”.
• You also can swap the current World Time City and Home Time City in the World Time Mode (page
E-40).
To enter the World Time Mode
Use
D
to select the World Time Mode as shown on page E-8.
• The mode dial hand will point to
WT
, and the current city code and city
name will scroll across the upper display. After that, the city code will
remain shown in the upper display. You can scroll the city code and
city name again by pressing
A
.
• Digital Meter A shows the seconds count.
• The hour, minute, and second hands will indicate the current
Timekeeping Mode time.
To view the time in another time zone
In the World Time Mode, use
E
(East) to scroll through city codes.
Currently selected
World Time City
Current time in the currently
selected World Time City
Currently selected
World Time City
Current time in the currently
selected World Time City
E-39
To specify standard time or daylight saving time (DST) for a city
1. In the World Time Mode, use
E
(East) to scroll through the available
city codes.
• Keep s
savi
display
2. To toggle between summer time (
DST
in the lower display) and
standard time (
DST
not displayed), hold down
A
.
• Usin
cit
Tim
• Note t
saviUTC is sel
• Note th
af
not affected.
• TUTC , pres
B
and
E
at the s
time.
DST indicator
Hold down A
DST indicator
Hold down A
Operation Guide 5302