EN
4
2. Set the channel by pressing the CHANNEL button
to the required number. If you are using more than
one sensor, select a different channel for each
sensor.
3. Slide the EU / UK switch to the setting which best
suits your location.
4. Press RESET.
5. Place the sensor near the main unit.
6. Press SEARCH to manually initiate signal sending
between the sensor and the main unit. The
reception icon on the main unit will blink for
approximately 3 minutes while it is searching for
the sensor. (Refer to the “Sensor Data
Transmission” section for more information.)
7. Press the °C / °F button to select the setting you
want.
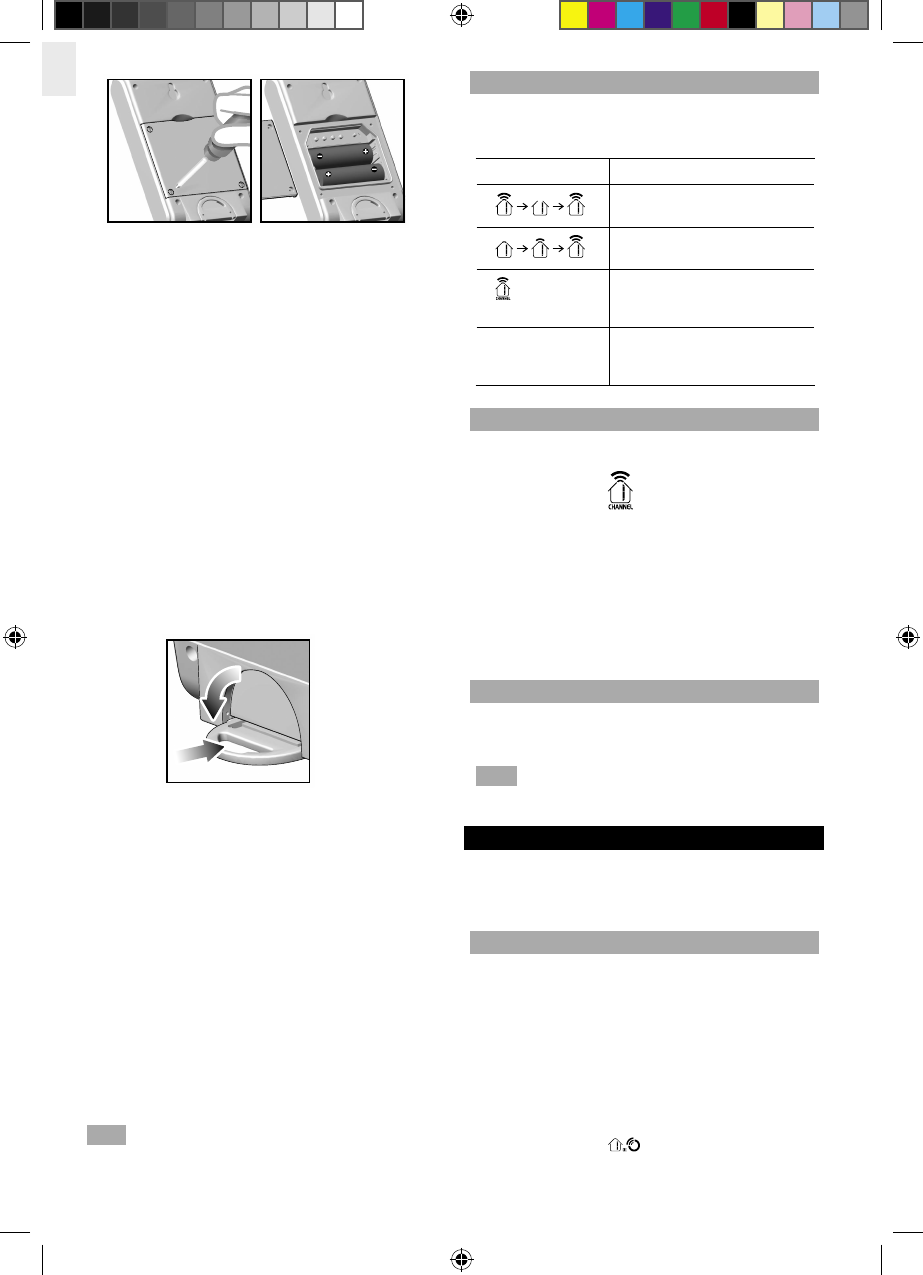
8. Close the remote sensor battery compartment.
9. Secure the sensor in the desired location using the
wall mount or table stand.
To fold out the stand:
For best results:
• Insert the batteries and select the unit, channel,
and radio signal format before you mount the
sensor.
• Place the sensor out of direct sunlight and moisture.
• Do not place the sensor more than 30 metres (100
feet) from the main (indoor) unit.
• Position the sensor so that it faces the main
(indoor) unit, minimizing obstructions such as
doors, walls, and furniture.
• Place the sensor in a location with a clear view to
the sky, away from metallic or electronic objects.
• Position the sensor close to the main unit during
cold winter months as below-freezing
temperatures may affect battery performance
and signal transmission.
NOTE The transmission range may vary and is subject
to the receiving range of the main unit.
You may need to experiment with various locations to
get the best results.
SENSOR DATA TRANSMISSION
Data is sent from the sensor(s) every 60 Seconds. The
reception icon shown in the Outdoor Temperature Area
indicates the status.
ICON DESCRIPTION
Main unit is searching for
sensors.
At least 1 channel has been
found.
Sensor 1 is sending data.
(The number shows which
sensor is selected.)
--- shows in Temp
Area
The selected sensor cannot
be found. Search for the
sensor or check batteries.
SELECT SENSOR CHANNEL
Press CHANNEL on the main unit, to switch between
sensors 1-5.
The house icon shows the selected remote sensor.
To auto-scan between sensors, press and hold
CHANNEL for 2 seconds. Each sensor’s data will be
displayed for 3 seconds.
To end auto-scan, press CHANNEL or MEMORY.
SEARCH FOR SENSOR
To search for a Thermo sensor, simultaneously press and
hold CHANNEL and MEMORY for 2 seconds.
NOTE If the sensor is still not found, check the
batteries.
CLOCK AND CALENDAR
This product tracks the time and date based on radio-
controlled signals from the RTHR328N remote sensor,
or manual settings that you enter.
RADIO-CONTROLLED CLOCK
The time and date are automatically updated by radio
controlled clock signals from official time-keeping
organizations in Frankfurt (Germany) and Rugby
(England) unless you disable this feature. The signals
are collected by the remote sensor (RTHR328N)
whenever it is within 1500 km (932 miles) of a signal.
Initial reception takes 2-10 minutes, and is initiated when
you first set up the unit, and whenever you press RESET.
Once complete, the reception icon will stop blinking.
The reception icon shown in the Clock Area
indicates 2 factors: